 I learned quite a bit about Shimano Di2 when I installed one of the first available Time Trial/Triathlon groupsets on my Cervelo P2. I’ve subsequently answered a lot of questions on forums and article comments, and elsewhere. In doing so, I realized that people have a lot of questions about Di2 and the answers are difficult to find. This lead me to create this article, to consolidate everything I know and have been asked into one location so people can find answers. If you can’t find what you’re looking for below, please leave a comment and I’ll do my best to help.
Index: There’s lots of info in this post, so here’s an Index to help you find specific sections:
- Di2 General Overview
- Compatibility: Between 6770 10-speed, 6780 11-speed, 9070 11-speed, first-gen 7970
- How to Check Battery Level
- How to Adjust Rear Derailleur Trim
- How to Adjust Front Derailleur Trim
- Dealer Installation Manuals
- Shimano E-tube Project Software – Change Settings and Update Firmware
- Chargers, PC USB Interfaces/Programmers
- Component Overviews
- Shift/Brake Levers
- Dedicated Shift Buttons
- Front Derailleurs
- Rear Derailleurs
- Display Units and ANT Bluetooth Wireless Communication Modules
- Batteries and Battery Mounts (Internal and External)
- Front Cable Connection A Junctions (with charger ports and LED status lights)
- Rear Cable Connect B Junctions
- Cables, Grommets, Cable Install Tools
- List of Components Needed to Build Your Own Di2 System
- Technical Details of the Di2 CANBUS protocol and signaling
System Overview: Shimano Di2 Dura-Ace 9150 and 9070 and Ultegra 6770 and 6870
The second generation Shimano Ultegra 6770/6870 and Dura-Ace 9070 “E-Tube” electronic bicycle shifting systems consist of battery-powered electric derailleurs activated by handlebar mounted push buttons. Power and shift commands are sent via a 2-wire CAN (Controller Area Network) datalink contained within a single cable housing. This design has several advantages over conventional mechanical shifting systems, the most notable of which are:
- Extremely low shifting effort, which generally results in more frequent shifts and therefore better gear ratio selection.
- Greatly improved shift quality, especially for the front derailleur chainrings, allowing shifting under full power with almost no chance of a dropped chain.
- Shifting is available at multiple positions on the handlebars, for example, at the end of the time trial aero bars, on the brake levers, up to in climbing position, and down low the sprint position.
- Automatic trimming of the front derailleur position as the rear derailleur moves back and forth between the smaller and bigger gears. This eliminates unintended contact (and noise) between the front derailleur and the chain.
- Lighter weight vs. equivalent mechanical system. The Shimano Dura-Ace Di2 9070 electronic groupset with internal battery weighs 2047 grams; the Shimano Dura-Ace 9000 mechanical groupset weighs 2074 grams (27 grams more than Di2.)
- Multi-Shift: Pressing and holding a rear derailleur shift button results in shifts through multiple gears. The rate of shifts can be configured using the PC computer interface cable and the free Shimano E-tube Project software.
- Synchronized Shifting: Starting with Dura-Ace 9150, automated Synchronized Sifting of the front derailleur is an option. Two SHIMANO Synchronized Shift modes will be available:
- Full SHIMANO Synchronized Shift: the front derailleur reacts based on the rear derailleur’s shift action. This essentially means that, when activated, there is no need for two separate shifters to control front and rear derailleurs, the two buttons on one shifter will control both derailleurs.
- Semi SHIMANO Synchronized Shift mode: the rear derailleur reacts based on the front derailleur’s shift action, shifting to the next most appropriate rear gear when the rider makes a front shift.
- R9120, R9170 – syncroshift enabled with firmware 3.2.0 or newer
- 6870, 9070 – syncroshift enabled with firmware 3.2.1 or newer
- 6770 – no syncroshift firmware update will be offered
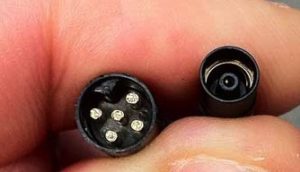 Historic Info on the older first generation 5-wire Shimano Dura-Ace Di2 DA-7970 system and how it compares to the new E-tube 2-wire system:
Released in 2009, the 7970 operated using a very basic 5-wire electronic system. Each shift button was connected to a different wire; shorting the specific wires together controlled the derailleur upshifts and downshifts. Because the first generation 7970 used completely different technologies than the newer 2-wire systems, none of the components are cross-compatible. At this point, Shimano is not expected to offer any updates or new components using the first generation 7970 architecture; everything from now on will be based on the newer 2-wire E-tube design. The second generation design offers several advantages, which include: 1) smaller wire size, smaller connector size, waterproof connectors; 2) all switches can be reconfigured in software to send upshift or downshift commands to either the front or rear derailleur; 3) firmware updates can add new features (such as multi-shift) and compatibility with new components.
Compatibility: Dura-Ace 9070 and Ultegra 6770 / 6870 (and old 5-conducter 7970)
The confusing naming system used by Shimano makes it difficult to figure out what each component is, much less what is compatible between systems. Here are some compatibility guidelines:
- Nothing from the first generation (4-conductor / 5-conductor) Dura-Ace Di2 7970 system is compatible with any other newer system. It was replaced by the (2-conductor) E-tube systems. No parts are inter-operable between 7970 and any other Di2 System.
- In general, every electronic Di2 component is compatible between the Ultegra 6770, 6870, and Dura-Ace 9070 systems (see exceptions below.) This means that all of the road bike Ultegra/Dura-Ace dual control brake levers/shifts, time trial shifters, and climbing shifters can be used with either Ultegra 6770/6870 or Dura-Ace 9070 front and rear derailleurs. Any of the Ultegra/Dura-Ace controllers (A Junctions) can be used with either system. All components use the same cables and connectors.
- Firmware Update Required to Make Older Components Compatible with Newer Components: If you add a new component and it doesn’t work, update the firmware using the PC USB adapter and the Shimano E-tube Project Software for Windows.
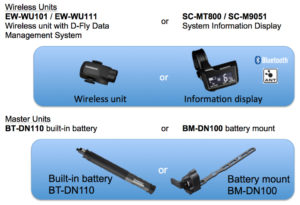
- Synchronized Shifting and Bluetooth Wireless Units can be added to all E-tube Ultegra and Dura-Ace systems but the battery has to be upgraded to the BT-DN110 Internal Battery or BM-DN100 External Battery Mount. To add Bluetooth capability, a EW-WU101 or EW-WU111 inline transmitter must be added to road bikes and for mountain bikes, the SC-MT800 or SC-M9051 display/transmitter unit must be added.
- Compatibility Exceptions:
- Note 1 – Sprint Shifter Exception: The Sprint Shifter is the only exception for shifter incompatibility. It has a different wiring connector (and internal components) that can only plug into a unique/dedicated third port on the Dura-Ace ST-9070 Dual Control Brake Levers/Shifters and also the ST-6870 Levers. There is no sprint shifter port on the ST-R785 Hydraulic Levers.
- Note 2 – Can’t mix 10-speed/11-speed front/rear Derailleurs: It is no longer possible to use a 10-speed front derailleur with an 11-speed rear derailleur (and 11-speed front with 10-speed rear.) See note farther below to read the history on this if you want all the messy details.
- Note 3 – Front A junction and Internal Battery: Since the February 2015 firmware update, the older SM-EW67-A-E Front Junction A is no longer compatible with the BTR2 Internal Battery because it does not have the charging port to charge the internal battery. The SM-EW90 Front Junction (with integrated charging port) should be used instead. The SM-EW67 still works with the external battery.
- Note 4 – Update the Firmware to make components compatible: If the firmware on all components is not updated to the latest version, some components may be not operate correctly with one another. So download the latest E-tube software and update everything and it should work.
- Note 5 – All Shifters work with all 10-speed and/or 11-speed Rear Derailleurs: All of the shifters are compatible with either the 10-speed Ultegra 6770 or 11-speed Ultegra 6870/Dura-Ace 9070 systems as long as they all have the latest firmware. The rear derailleur is the only component that “knows” or “cares” how many rear gears are available. The shifters only send upshift/downshift commands and do not “know” or “care” which gear is currently selected and how many total gears there are.
- Note 6 – SM-BTR1 External Battery and SM-BMR1 Mount firmware updates: The more expensive dedicate service tool (SM-PCE1 PC Interface) must be used to upgrade the firmware on the external battery/mount.The external battery and battery mount can not receive firmware upgrades via the SM-EW90 Front Junction A and the SM-BCR2 PC Interface/Battery Charger. (The SM-EW90 will work in a system with an external battery, but a firmware update can cause them to become incompatible until both are updated independently using the appropriate PC Interface and the Shimano E-Tube Project software.)
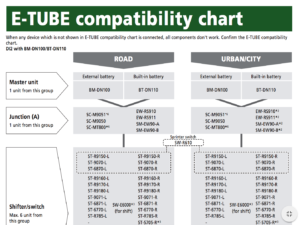
- See the Shimano E-tube compatibility chart version 3.4.3 for more details
Compatibility: 11-Speed Rear Derailleur and 10-speed sprockets/wheels
The 11-speed Dura-Ace 9070 and Ultegra 6870 rear derailleurs are designed exclusively for 11-speed rear sprockets and 11-speed Front Derailleurs. Shimano does not provide a way to recalibrate/reprogram them for a 10-speed setup. The sprocket spacing is slightly smaller and the overall range of travel slightly longer on 11-speed systems. If you have 10-speed wheels and 10-speed sprockets, you should use the 10-speed RD-6770 rear derailleur and a 10-speed FD-6770 front derailleur.
Similarly, a 10-speed RD-6770 rear derailleur should not be used with 11-speed sprockets. There will be chatter in some gears, and there might be slow-shifts or self-shifts.
It doesn’t matter which shifters are used; the shifters send upshift/downshift commands regardless of which derailleur config is being used. Shifters do not “know” or “care” which gear is currently selected and how many total gears there are.
Front Chain Rings: In general, most any front chain rings will work, rigid forged rings work best with Di2 due to high front derailleur shift forces. Shimano chain rings tend to be the best, but most others work as well. A 10-speed specific or 11-speed specific chain should be used, but the differences between them are minimal and can generally be mixed/matched without issue.
How to convert “non-upgradeable 10-speed only” wheels such as Zipp 900/Sub9 Disc Wheels to 11-speed: “the spacing between a Campy 11 and Shimano 11 is close enough that you can use the cassettes interchangeably. If you get a Campy free hub body, the 2 shims (part# is on the Zipp website, just search for Campagnolo 11) and a Campy cassette and you’re ready to ride with all 11 cogs available to use.” via slowtwitch.com
But it’s an emergency and I need to use a 10-speed wheel. . . In emergency situations, 11-speed rear derailleurs can be used with 10-speed sprockets. There will probably be chatter in some gears, and there might be slow-shifts or self-shifts. To setup an 11-speed rear derailleur for a 10-speed sprocket setup, adjust the mechanical limit screw so that it can’t shift into the missing 11th sprocket position, then follow the rear derailleur adjustment procedures listed below.
Included for very motivated individuals only: 10-speed front derailleurs can be used with 11-speed rear derailleurs if the shifters and battery have firmware installed from E-tube software version 2.5.2 or earlier. Shimano disabled support for this 11-speed and 10-speed cross-matching with later firmware updates. For informational purposes only, the details of how to regain compatibility are detailed below.
- Important Notice 2014-07-14: There is a compatibility issue with Shimano e-Tube software/firmware versions v2.6.0 and later that prevents 10-speed front derailleurs (FD-6770) from working with 11-speed rear derailleurs (RD-6870) and 11-speed front derailleurs (FD-6870) from working with 10-speed rear derailleurs (RD-6770). DO NOT UPDATE FIRMWARE using Shimano e-Tube software v2.6.0 or later if you are mixing an FD-6770 front derailleur and a RD-6870 11-speed rear derailleur, or a FD-6870 with a RD-6770.
- The problem component is the battery (external battery mounts SM-BMR1 and SM-BMR2, internal seat post battery SM-BTR2.) If you keep battery firmware at v2.0.6 or earlier, the system will continue to function properly. Shimano e-Tube Software v2.6.0 will update battery firmware to v3.0.5, and will not allow the RD-6870 to work with a FD-6770 setup.
- If the battery firmware is updated to 3.0.5, it CAN NOT be rewritten back to the older version. You will need to need to replace a derailleur so that both are 6770 10-speed or so that that both are 6870 11-speed. (The other option is to get get a battery with the older firmware and never update it.)
- Here’s a link to the “last known good version” of the Shimano e-Tube software to work with a mixed 10-speed/11-speed system: E-tube_Proj_V_2_5_2.zip Use this version and do not connect to the internet when using it so that E-tube can’t check for updates when open.
- To roll-back newer versions of battery and shifter firmware, install E-tube version 2.5.2 and made a copy of “C:\ProgramData\E-tube Project\FW” which has all the firmwares packaged in that version of E-tube. Next, install the latest version of E-tube. Then copy all the firmwares from the the 2.2.3 version back to the same location “C:\ProgramData\E-tube Project\FW” for the latest version (note: ProgramData is a hidden directory, click here for details on how to view it.). Next, the trick is to find the firmware you want to downgrade (pretty easy from the name and version in the file name), and then rename it to the same name as the latest version, but increment the last version digit by one. Then connect to the bike with E-tube (without an internet connection) and it will identify that a firmware upgrade is available for that component and allow you to do the firmware “upgrade” to the older version of firmware. Now exit E-tube and then rename the firmware file back to original to prevent the issue in future. E-tube will then try to upgrade again but just don’t let it do that. This should get a bike that did nothing (not even enter adjustment mode) to a fully working state by reverting the battery and shifters. Running latest firmware in derailleurs seems to be fine. (thanks to commenter vosadrain)
- It will not be possible to charge the BTR2 internal battery using the BCR2 USB charger unless you also downgrade the firmware of the BCR2 USB charger as well.
- Note however that latest E-tube software will say the setup is unsupported and will not allow programming. To do programming, disconnect the internal battery and connect a spare external battery. This allows making settings changes. To program the BTR2 itself, I just connect to the BTR2 by itself (no other components) and the E-tube software will allow firmware changes to it. Or try using the 2.5.2 version of E-tube.
- Alternatively, buy a Di2DIY internal seat post battery kit and you will not have to go through the firmware downgrading. The kit makes it possible to run all components with the latest E-tube firmware. Also worth noting some firmware updates were done to fix power distribution errors in the FPGA’s that would allow the batteries to drain down when the bike was just sitting.
Checking Battery Charge Level:
A single battery charge should give at least 1500 miles of riding. Most riders will not need to charge the battery more than twice a year.
To check the battery charge remaining, press and hold any shifting switch for 0.5 seconds or more. The amount of battery charge remaining will be indicated by the light on Front Controller A Junction.
- 100% remaining: Illuminates green (for 2 seconds)
- 50% remaining: Flashes green (5 times)
- 25% remaining: Illuminates red (for 2 seconds)
- 0% remaining: Flashes red (5 times)
When the battery charge is low, first the front derailleur will stop operating, and then the rear derailleur will stop operating. When the battery charge has been fully spent, the derailleurs will be fixed at the last gear shifting position. If the battery indicator is illuminated red, it is recommended that you recharge the battery as soon as possible.
Adjusting the Rear Derailleur Trim:
If you switch between multiple rear wheels, it’s very likely that the sprockets on different wheels won’t be in exactly the same relative position to the rear derailleur, resulting in that annoying clicking sound as the chain makes contact with an adjacent sprocket. Follow the steps below to properly align the rear derailleur with the rear sprockets.
- Shift the rear derailleur to the 5th sprocket position. Press the button at the junction (A) of the SM-EW67-A-E until the red LED illuminates in order to switch to rear derailleur adjustment mode. Note that if you keep pressing the button after the red LED has illuminated, protection recovery operation will begin.
- If shifting switch is pressed once while the initial setting condition is active, the guide pulley will move one step toward the inside. If shifting switch (Y) is pressed once, the guide pulley will move one step toward the outside.
- Note: The guide pulley can move 15 steps inward and 15 steps outward from the initial position, for a total of 31 positions.
- Note: When adjusting, the guide pulley will overrun slightly and then move back in an exaggerated movement so that you can check the adjustment direction. When checking the positions of the guide pulley and the sprocket, check at the position where the guide pulley finally stops.
- While turning the front chainwheel, operate shifting switch to move the guide pulley toward the inside until the chain touches the 4th sprocket and makes a slight noise.
- Next, operate shifting switch 4 times to move the guide pulley toward the outside by 4 steps to the target position.
- Press the button at junction (A) until the red LED turns off in order to switch from rear derailleur adjustment mode to gear shifting mode. Shift to each gear and check that no noise is generated at any gear position. If fine adjustment is needed, switch back to adjustment mode and readjust the rear derailleur.
- Note: if you have customized your shifters and swapped buttons, this will change which shifter and buttons control the micro-adjustments. Also, if you hit the wrong buttons while trying to set the FD trim, you can actually alter the setup of your RD. Be certain that you’re hitting the correct adjustment buttons.
- If you have a Garmin or similar head unit and a SM-EWW01 ANT module, the display will automatically switch into derailleur trim display when you activate that mode (i.e. by pressing the button at the junction (A) of the SM-EW67-A-E.) It will give you the trim position in either + or – 12 positions. When switching wheels, simply take note which position suits which wheel/sprocket/trainer, and trim to that level each time you change. This removes the guesswork and makes changing from wheel to trainer simple.
Note on FD-6870 Front Derailleur Trim:
The FD-6870 trim adjustment effects the auto-trim positions. The adjustment feature is accessible via either the A-Junction box, or the “Front derailleur adjustment setting” in the e-tube software, and should be used only after you have already set the physical inner/outer limit screws. So for example, if the FD outer plate rubs the chain when using the 6th largest cog, you would want to adjust the FD trim outward a couple ticks. However, you can only perform this adjustment while in the big-ring/big-cog combination. Etube forces the derailleurs into this maximum cross-chained position, whereas during the manual method you must shift to these positions yourself. (Thanks to commenter Bryan B for the info.)
Dealer Manuals:
The dealer’s manuals contain the most detailed information available from Shimano. If you’re looking for detailed installation instructions, check here:
- Shimano Ultegra 6770 Dealer’s Manual: http://techdocs.shimano.com/media/techdocs/content/cycle/SI/Ultegra/UltegraDi2/6770Di2_DM_EN_v1_m56577569830773882.pdf
- Shimano Ultegra 6870 Dealer’s Manual: http://si.shimano.com/php/download.php?file=pdf/dm/DM-UL0001-00-ENG.pdf
- Shimano Dura-Ace 9070 Dealer’s Manual: http://si.shimano.com/pdf/dm/DM-DA0001-00-ENG.pdf
- Shimano Alfine Di2: http://si.shimano.com/php/download.php?file=pdf/dm/DM-AL0001-03-ENG.pdf
Shimano E-tube Project Configuration and Firmware Update Software for Windows:
Shimano E-tube Project Wireless for iOS and Android: Announced on April 15, 2016 but as of yet unreleased, these apps will allow configuration of shift profiles (multi-shift on/off, multi-shift delay between shifts, shifter button assignments) and firmware updates over Bluetooth. To function, a Shimano Di2 Bluetooth Adapter, such as the MT800 digital display, is required.
Shimano E-tube Project Windows PC Software: This free software is used to update the firmware of all components. It works with the SM-BCR2 Charger + USB Adapter and the SM-PCE1 Diagnostic Adapter. The software is used to change the configuration of each shift button / lever (any can be programmed to upshift or downshift either the front or the rear derailleur.) It can also be used to enable multi-shift (multi-shift is where the shifter is held and the rear derailleur shifts through multiple gears until the shifter is released.) The delay between of the gear changes during multi-shifting can also be adjusted. The software is available from http://e-tubeproject.shimano.com/
Older versions of the e-tube software are available from these links: 2.5.2
PC & Mobile Interfaces, Chargers, and Software:
SM-BCR1 Battery Charger: This is used to charge the external battery. The part number for the battery charger wall cord is SM-BCC1.
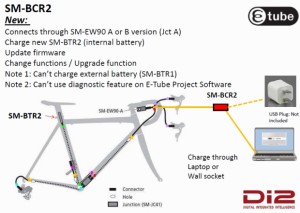
SM-BCR2 Charging and PC Connection: for SM-EW90-A 3-port and SM-EW90-B 5-port A Junctions. This plugs into a special port on the side of the A junctions (which is covered by a rubber flap.) This adapter charges the internal battery when first plugged into the A junction; it must be powered by a standard USB Wall charger (such as that used for an Apple iPhone) or a PC that is powered-on. If the Shimano E-Tube Project Software is launched on the Windows PC with the SM-BCR2 attached, the SM-BCR2 will switch from charging mode to configuration mode. It must be detached from the computer and reattached to switch back to charging mode.
- It takes about 2 hours to charge the internal battery.
- Amber light=charging.
- Light turns off when done.
- If the Amber light does not come on when plugged in, this indicates battery is not discharged enough to charge.
- Light flashing indicates something is wrong, like trying to charge a external battery through a BMR.
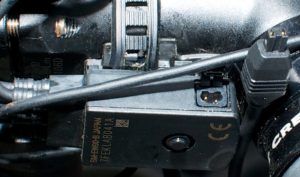
Hacking the SM-BCR2 to have a standard Di2 cable connector: If your 3-port or 5-port junction is inaccessible for charging, there is an alternative hack method to connect it to the system through a standard Di2 port. With basic soldering skills you can hack the BCR2 to be used with any setup. Buy any length EW-SD50 wire, cut off one end. Cut the wire on the output side of the BCR2. Splice the two wires together, so that the output wire of the BCR2 is now a standard Di2 connector. The charger has an inner (white) and outer (shield) wire; connect the inner white wire to the SD50 red wire; connect the charger outer shield wire to the SD50 black wire. You will then be able to plug the BCR2 into any Di2 port. Or use a SM-JC40 junction B and another length of EW-SD50 wire and go through the RD (by using the SM-JC40 to connect the rear derailleur, new output wire of the EW-SD50, and the wire that ordinarily connect the rest of the system to the rear derailleur.) Thanks to @Di2diy for the info.
SM-PCE1: This PC Configuration and Diagnostics adapter will not charge the internal battery. It offers the same configuration options as the SM-BCR2, but also add some advanced diagnostic and troubleshooting features that the SM-BCR2 does not have. It attaches to via the standard E-tube wire (just like the EW-SD50 cables) rather than to a dedicated port on the side of the front A junction.
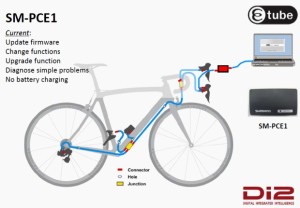
Bluetooth and E-tube Apps for Apple iOS and Android: Bluetooth wireless modules are available to allow system settings to be adjusted via the mobile applications that connect via Bluetooth Adapters.
Component Overview:
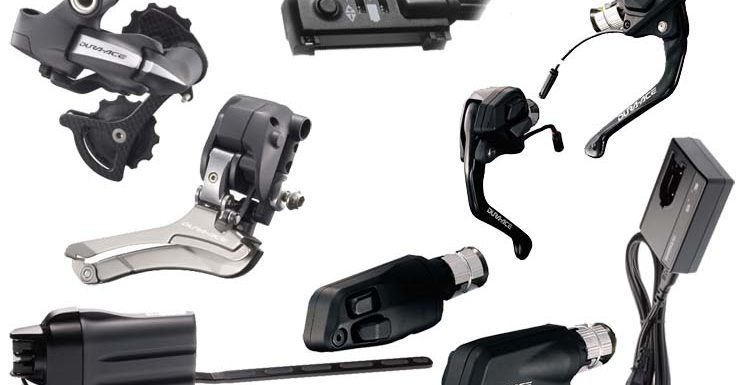
The confusing naming system used by Shimano makes it difficult to figure out what each component is, much less what it does and how it fits into an a complete Di2 system. Here’s an overview of all the major Ultegra and Dura-Ace Di2 components.
Dual Control Brake Levers/Shifters (a.k.a. Brifters):
ST-6770 Ultegra Road Dual Control Brake Levers/Shifters: The Ultegra version can be used with the climbing shifters. They are sold in in left/right pairs and are also available separately.
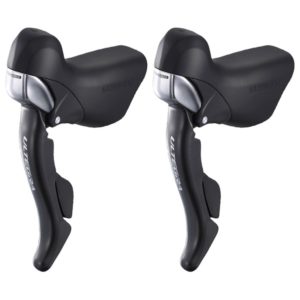
ST-9070 Dura-Ace Road Dual Control Brake Levers/Shifters: The main advantages these have over the ST-6770 version is slightly lighter weight and compatibility with the low-mount sprint shifters. As like the Ultegra version, they are compatible with the climbing shifters. They also have hidden button under the rubber hoods that can activate screen changes on cycling computers from Garmin, Magellan, Pioneer, and Shimano (Shimano SM-EWW01 ANT Wireless Broadcast Module required.)
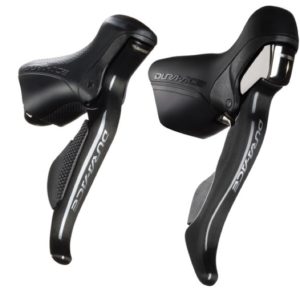
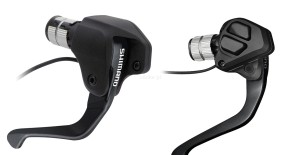
ST-9071 Dura-Ace Time Trial/Triathlon Dual Control Brake Levers/Shifters: These levers provide shifting from the pursuit bar position on time trial bikes. There is no Ultegra option offered at this time. These are available as left/right pairs, or can be ordered separately. These do have a permanently attached wire with a male end for connection the the SM-EW90 front “A” junction. Combined weight both levers: 117 grams.
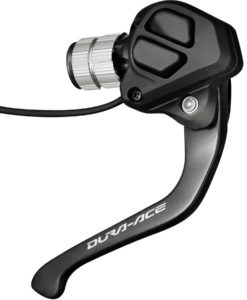
ST-R9160 (standard cable brakes) and ST-R9180 (hydraulic brakes) Time Trial Dual Control Brake Levels/Shifters: These are the lower-profile shifters offered with the newer Dura-Ace R9150 groupset.
ST-6871 Ultegra Time Trial/Triathlon Dual Control Brake Levers/Shifters: Ultegra version of the ST-9071 Dura-Ace shifters. Slightly heavier and much less expensive than the Dura-Ace version. Combined weight both levers: 142 grams.
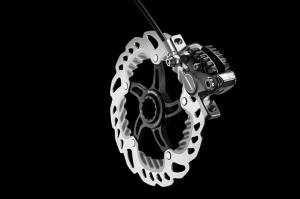
ST-R785 Hydraulic Road Dual Control Brake Levers/Shifters: These hydraulic road shifters are compatible with both the climbing and sprint shifters. These are compatible with the SM-RT99 centerlock 140mm and 160mm rotors and WH-RX31 wheelset (which as no standard rim brake track.) These require the BR-785 dual piston hydraulic disc calipers. They do not have the special wiring port required for the SW-R610 Sprint Shifters and a SM-EW90-B 5-port junction A is required to use the SW-R600 climbing shifter.
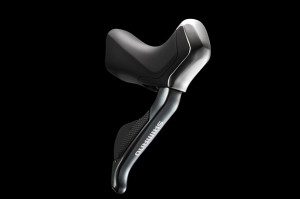
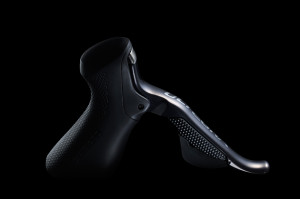
ST-6870 Ultegra Road Dual Control Brake Levers/Shifters: These road shifters are compatible with both the climbing and sprint shifters.
Dedicated Shifters:
SW-R671 Dura-Ace 2-Button Time Trial/Triathlon Bar End Shifters: These shifters are installed on the end of time trial aero bars. By default, the left shifter upshifts/downshifts the front derailleur; the right controls the rear derailleur. For both, the lower button upshifts into a harder gear and the upper button downshifts to an easier gear. This can be changed using the Shimano E-tube Project software; the functions of the left and right sifters can be switched with one another as well. These are available in pairs or separately.
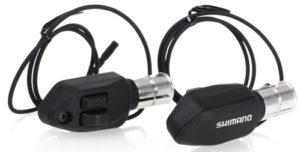
SW-9071 Dura-Ace 1-Button Time Trial/Triathlon Bar End Shifters: These shifters have only one button each and are intended to control only the rear derailleur, with one sending the upshift command and the other the downshift command. (I personally think this version is absolutely worthless. Why have 2 SW-9071 shifters at twice the price and twice the weight, when you can just buy a single SW-R671 Right shifter instead.)
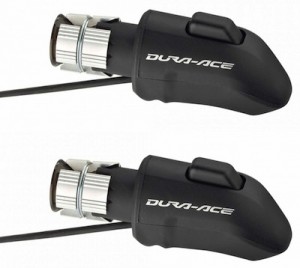
SW-R600 Climbing/PAVE Shifter: This shifter is for road bikes and is mounted on the upper horizontal portion of the handlebar, or any other location comfortable for the rider. They can be used in addition to the Dual Control Brake Lever/Shifter, or can be used on their own by plugging directly into a SM-EW90-A 3-Port Junction or SM-EW90-B Dura-Ace 5-Port Junction.
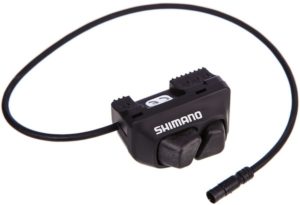
SW-R610 Dura-Ace Sprint Shifter: This is the only component using a unique wiring connector; it is only compatible with the ST-9070 Dura-Ace and Ultegra ST-6870 Road Dual Control Brake Levers/Shifters. Unlike all of the other shifters, the sprint shifters do not contain a circuit board; they do not show up as components on the CAN bus network. Instead, the sprint shifters are simple momentary switches that activate the circuit board on the host Dual Control Brake Lever/Shifter. The host dual control lever is what sends the shift command. (Note: Any momentary switch can be attached to the sprint shifter port on the Dual Control Levers by splicing into a standard EW-SD50 wire to act as remote shifters.)
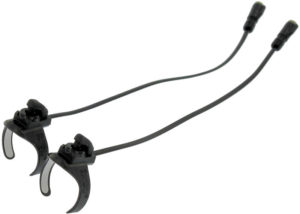
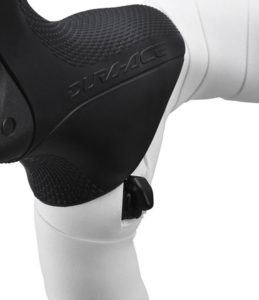
Alfine SW-S705 Right Flat-Bar Shifter: Reported to work with other non-Alfine setups.
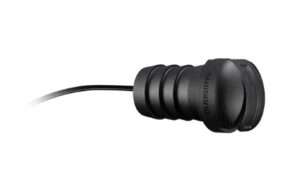
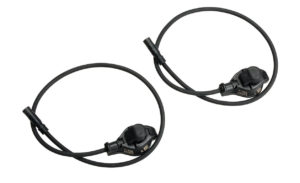
SW-R9160 Time Trial bar-end shifters (pair): These are-end shifters directly control the rear derailleur, with one for the upshfit and one for the downshift. The front derailleur is controlled automatically via automatic Synchronized Shifting. These shifters require the BT-DN110 Internal Battery for synchronized shifting.
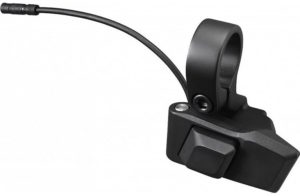
SW-R9150 Climbing shifters (pair): These tiny climbing shifters are about as small as the sprint shifters, but can be directly connected to a junction box and do not have to be connected as slave buttons to a brake/shift lever special port. They come with plastic mounts to make it easier to attach to bars beneath bar tape. They are ideal for synchronized shifting, with one controlling the upshifts and the other downshifts. These shifters require the BT-DN110 Internal Battery for synchronized shifting.

Front Derailleurs:
FD-6770: Ultegra Front Derailleur
FD-6870: Ultegra Front Derailleur, pretty much identical to the FD-6770 but with a slightly larger diameter adjusting screw (to better dissipate the shifting forces).
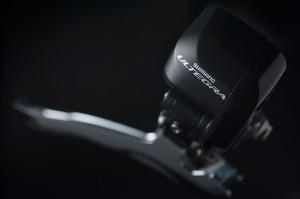
FD-9070: Dura-Ace Front Derailleur
FD-R9150: Dura-Ace Front Derailleur for 9150 systems; features slightly reduced weight vs. 9070.
Rear Derailleurs:
RD-6770: Ultegra 10-Speed Rear Derailleur, compatible with gears up to 28 teeth.
RD-6870: Ultegra 11-Speed Rear Derailleur, compatible with gears up to 32 teeth (for the GS version).
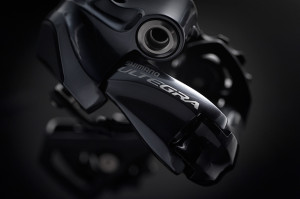
RD-9070: Dura-Ace 11-Speed Rear Derailleur, lighter weight version on which the RD-6870 is based.
RD-R9150: Dura-Ace 11-Speed Rear Derailleur with 30-tooth sprocket compatibility and modified “Shadow RD” geometry to keep the mechanism close to the rear wheel to help avoid damage in the event of an accident.
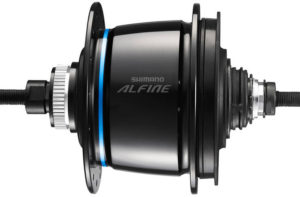
Alfine SG-S505 and SG-S705: The Shimano series targets comfort and urban bikes. It uses an 8-speed (505) or 11-speed (705) internal epicyclic rear hub. It is believed to be compatible with other Di2 ETube components but this has not been verified.
Display / Wireless Communication:
SM-EWW01 ANT Wireless Broadcast Module: This module wirelessly broadcasts Di2 data (front and rear gear selection details, gear ratio, battery life) to a cycling computer using the ANT protocol. It is compatible with Dura-Ace 9070, Ultegra 6870 Di2 and Ultegra 6770 E-tube road shifting systems. SM-EWW01 plugs into the E-tube wiring system between existing components. It has an 2 wiring ports, so it can be connected between a front shifter and the Front Junction A, or at the rear derailleur (between rear derailleur and Etube wire.) It transmits through a proprietary private ANT wireless protocol, which may eventually become a standard public ANT+ protocol. It is powered by the same Di2 system battery. It is currently compatible with the Garmin Edge 1000, Mio 505, and the PRO SCIO cycling computers (with more to come.) The hidden buttons under the hoods of the 9070 shifter levers will switch screens on the cycling computer when paired with this module. It does not currently allow for shifting control from a cycling computer/device and it is not clear that this functionality will ever be offered. The SM-EWW01 is 38mm long, 25mm wide, 12.5mm high, and weighs less than 5 grams. It does not come with any wires; 1 wire would have to be added if adding this module to an existing Di2 system.
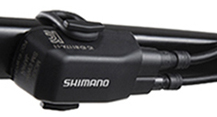
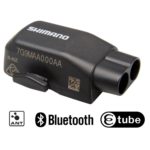
EW-WU101 and EW-WU111 ANT and Bluetooth Wireless Broadcast Modules: These modules are similar to the SM-WEE01 but also include Bluetooth capabilities in addition to ANT capabilities. They require the BT-DN110 battery or the BM-DN100 Battery Mount and cannot be used with the SM-EW67 Front A Junction.
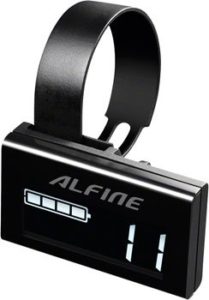
SC705 Alfine Display Unit: This unit displays the battery level and the rear derailleur gear selection. It is powered by the system battery and has a port for the SM-BCR2 internal battery charger / USB diagnostic tool. It is primarily designed for Alfine systems (both 8 505-series and 11 speed 705-series). It is compatible with Ultegra and Dura-Ace Di2.
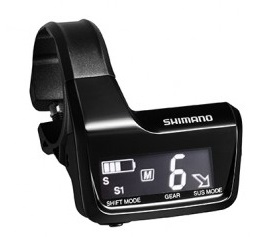
MT800 Digital Display with Bluetooth: Primarily aimed at XT mountain bike applications, this display allows toggling between the 3 synchronized shift modes (where both derailleurs are intelligently coordinated in unison by one pair of buttons, so no need for discrete shifting of the front derailleur.) It also shows battery level, gear position, shift mode and FOX iRD suspension position. The Digital Display required the new BT-DN110 battery. Existing Di2 XT systems are upgradable to be compatible with the new digital display after battery upgrade and firmware upgrade. This display has 3-port Di2 Cable junction and charging port integrated into the back and serves as a Front A Junction.
Batteries and Battery Mounts:
The batteries contain the main controllers for the system. It is therefore required to upgrade the battery to get features released in new versions of Di2 (such as Synchronized Shifting that automatically controls the front derailleur based on rear derailleur shifting.)
SM-BTR1 External Battery: This external battery must be used with the SM-BMR1 battery mount. It is removed from the mount and charged using a dedicated charger.
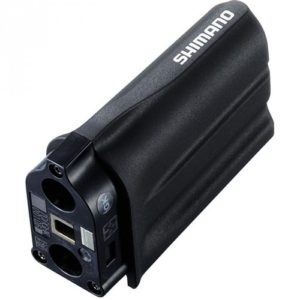
SM-BMR1 and SM-BMR2 External Battery Mount: This mount attached to bottle cage mount points or other dedicated frame mounts. It is available in 3 different mount lengths: -I (intermediate length), -S (short length), -L (long length). The SM-BMR2 is an updated version of the SM-BMR1.
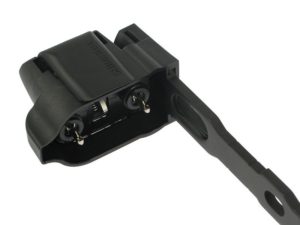
SM-BTR2 Internal Battery: This battery is typically mounted in the seat post or seat tube of the frame. It is charged by plugging the SM-BCR2 Charging Cable/PC Adapter into the SM-EW90-A or SM-EW90-B Front A junctions.
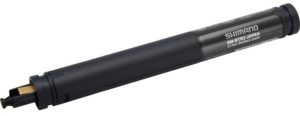
BT-DN110 Internal Battery: This battery is required for Bluetooth wireless units and road groupset Synchronized Shifting functionality.
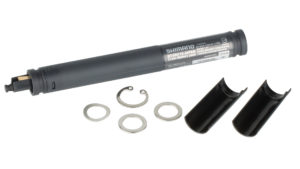
BM-DN100 External Battery Mount: This battery is required for Bluetooth wireless units and road groupset Synchronized Shifting functionality.
Front A Junctions:
SM-EW67-A-E Ultegra 3-Cable Junction: This is the original front junction with 2 integrated cables to connect to the dual control brake lever/shifters. The male cable ends on this Front A Junction will not mate directly to the male cable ends on any of the Time Trial/Triathlon dual control brake shift levers or shifters; SM-JC41 Rear B Junctions can be used to connect this front A junction to TT/Triathlon shifters. This Junction works only with External Batteries, not Internal Batteries.
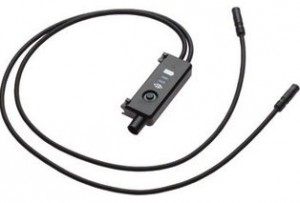
SM-EW90-A Dura-Ace 3-Port Junction: This front “A” junction is most commonly used in road bike setups. 2 ports connect to the dual control brake / shift levers; the third port is for the cable that leads to the bottom bracket junction.
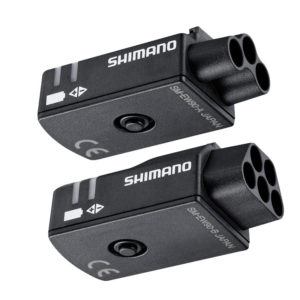

SM-EW90-B Dura-Ace 5-Port Junction: This front “A” junction is primarily used in the Time Trial / Triathlon setups. 2 of the port are for the brake/shifter dual control levers, 2 of the ports are for the aer0 bar bar-end shifters, and the 5th port is for the cable that runs to the bottom bracket (where the B junction joins the wires from the front A junction, front derailleur, rear derailleur, and battery.)
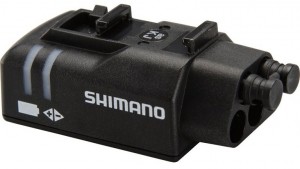
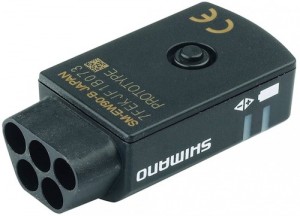
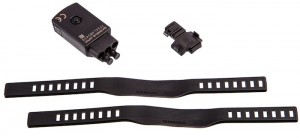
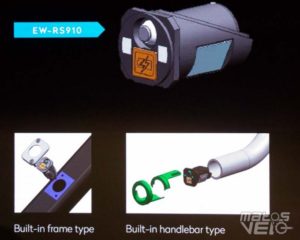
EW-RS910 Internal Bar-end Junction: This junction is installed into the end of a bar or in a dedicated frame port. It facilitates internal cable routing.
B Junctions:
SM-JC41 Internal Junction: This version has the exact functionality as the SM-JC40 external version, but doesn’t have the mounting tab for being bolted to the bottom bracket or wrapping the extra cable lengths. It has 2 ports on one end and 2 on the other, making it more compact. In addition to being located at the bottom bracket to connect the A junction, battery, front derailleur, and rear derailleur, it can be used at the handle bars to join multiple shifters prior to being connected to the A Junction.
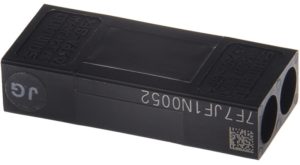
SM-JC40 External Junction: This version is intended to be attached to the frame using the bolt that is commonly located underneath the bottom bracket housing. This junction contains no electronics; it’s sole purpose is to join 4 connectors together, which are usually the wire from the front A junction, the battery, the front derailleur, and the rear derailleur. There are wire holders above the housing to capture the extra wire length by wrapping it back-and-forth.
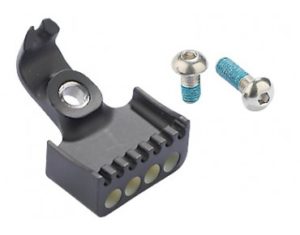
Cables, Grommets, and Cable Remove/Install Tool:
EW-SD50 Cables: These cables connect the front A junction, the battery, the front derailleur, and the rear derailleur to the rear B junction, which is typically located near the bottom bracket (near the cranks.) These are available in lengths of 300mm, 350mm, 400mm, 500mm, 550mm, 600mm, 700mm, 750mm, 950mm, 1000mm, 1200mm, 1400mm.
SM-GM01 Grommet: These round grommets are used when drilling round holes for internal cable routing, or with existing round holes. The required hole diameter is 6mm (6mm = .236 inches. Use a 7/32-inch drill bit and then “wallow-out” the hole to make it a little bigger; a 1/4-inch drill bit will work but is just slightly larger than necessary.)
SM-GM02 Grommet: These 7mm x 8mm oval shape grommets are used in some situations / frame designs.
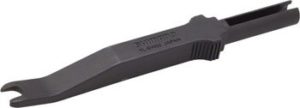
Shimano TL-EW02 Ultegra DI2 E-Tube Tool: This tool is used to connect and disconnect the Etube wires. They are extremely difficult to connect/disconnect by hand, and pliers or other tools can damage the wires. Don’t get this confused with the TL-EW01 tool, which is for the older 5-wire 7970 cables. (My Dura-Ace TT Dual Control Levers came with one of these tools, but no other components did.)
Common Questions (via Shimano):
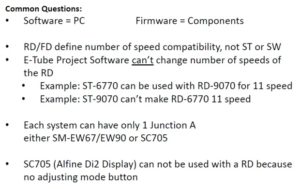
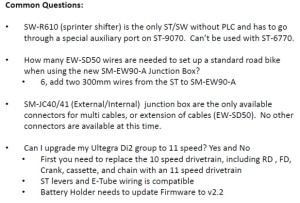
Note: it is not necessary to replace the FD from upgrading from 10-speed to 11-speed.
What Components do I need to put together my own Di2 system?
Because of the huge number and variety of components, it’s very difficult to figure out what is actually necessary and what is optional. So here is a list, for the setup I recommend: Ultegra 6870. It starts from the handlebars and works backwards. (This assumes both front and rear derailleurs, but you actually don’t have to have both; you can pick one or the other and only the corresponding front shifter to go along with it.)
- Any Type of Shifters / Shift Buttons. The Dual Control Brake Levers/Shifters are not required. You can get the just the climbing shifters or Triathlon/TT bar-end shifters, and then potentially add the Dual Control Levers/Shifters at a later point. (The only exception is the Sprint shifters, which require specific Dual Control Levers/Shifters with special ports as noted elsewhere in this article.) Amazon.com link
- EW-SD50 Wires 1 and 2 between the front shifters and the Front Junction A (0nly for some shifters). This is a bit confusing, because some of the front shifters come with wiring attached to them and some of them require purchasing separate wires. In general, most of the stand-alone shifters come with wiring, as do the TT/Triathlon dual control shifters/levers, but the road dual control levers do not. Amazon.com link
- Front Junction A. I recommend the SM-EW90-B 5-port front junction A as it provides the most upgrade flexibility; get the 3-port option only if you’re positive you’re never going to add more shifting components. The older SM-EW67-A-E has 2 wires built-in to connect with each of the dual control shift/brake levers; it doesn’t offer much flexibility or compatibility with a TT/Triathlon setup or adding additional shifters. Amazon.com link
- EW-SD50 Wire 3 between the Front Junction A and the 4-port Rear Junction B connector. Amazon.com link
- EW-SD50 Wire 4 between the Rear Junction B and the Front Derailleur. Amazon.com link
- EW-SD50 Wire 5 between the Rear Junction B and the Battery. Amazon.com link
- EW-SD50 Wire 6 between the Rear Junction B and the Rear Derailleur. Amazon.com link
- Rear Junction B: This is where the wire from the front of the bike is connected to 3 output wires leading to the front derailleur, rear derailleur, and battery. SM-JC40 is for external wiring, SM-JC41 is for internal. Amazon.com link
- Grommets for any place where the wire goes into the frame through a drilled hole. Amazon.com link
- Front Derailleur. I recommend the Ultegra FD-6870 for 11-speed builds or the FD-6770 for 10-speed builds. The Dura-Ace FD-9070 is pretty much identical, just slightly (41g) lighter and 11-speed only. (I do not recommend the Ultegra FD-6770 unless you have a 10-speed setup, because of firmware compatibility issues with 11-speed rear derailleurs. Also, it is an older design than the FD-6870, so it is larger and offers slightly less shifting force.) Amazon.com link
- Battery and Charger. Internal or external, depending on the build. If you have to skill/time/money-to-pay-someone to get everything internal, I highly recommend that option. The SM-BTR2 internal battery has more advanced integrated electronics and is better for firmware upgrades with the SM-BCR2 internal battery charger/PC tool. If you go with the SM-BTR1 external battery, you will need the SM-BMR1 external battery mount and SM-BCR1 external battery charger. Amazon.com link
- Rear Derailleur. I recommend the Ultegra RD-6870 for a new build if you have 11-speed compatible wheels with 11-speed sprockets, or the Ultegra RD-6770 if you have 10-speed wheels/sprockets. The system must be match front and rear derailleurs (both 6870 11-speed or both 6770 10-speed.) Amazon.com link
- TL-EW02 Etube Wire Remove/Install Tool: It takes quite a bit of force to snap the wires in/out. You may think you can get it seated properly with just your fingers, only to then have the wire come loose because it wasn’t fully seated. It’s a good idea to keep one in your saddle bag. Amazon.com link
What wire lengths do I need? This question is impossible to answer correctly, as it’s highly dependent on the frame size and configuration. What I recommend is running string between the component mounting locations to measure the lengths. Be sure to add some extra length, as I find that wires seem to come up short pretty frequently, even when “adding a little extra” to start with. Nothing is more frustrating that having a wire that is 25mm too short. I recommend ordering a few extra wires of multiple lengths and then returning the unneeded/unused wires. As noted above, the standard wire lengths are 300mm, 350mm, 400mm, 500mm, 550mm, 600mm, 700mm, 750mm, 950mm, 1000mm, 1200mm, 1400mm. Do not cut/splice these wires; the connectors on the end of the wires are very small in diameter to start with and you’ll end up with a splice that is larger and less waterproof than you started with.
Acknowledgements: Special thanks to Di2diy for his continued help in the comments. Check out his Ebay store for custom Di2 batteries, harnesses, and components.
Technical Details of the Di2 CANBUS protocol and signaling
Thanks to commenter Ghislain for the details: “I reversed engineered the signal going to the RD. Since I did not have a special tap connector, I could only look at the actual signals in open loop (RD wire disconnected) on the wire going to the RD using an oscilloscope. First, I found that shift up and down are multiplexed on the same wire. A shift down would generate a positive 100 msec clean 8 volt pulse (varies between 50 msec to 500 msec depending on how long you hold the shifter). On the same wire, a shift up would generate a series of 2 msec pulses that would last the same time of a shift down pulse. Therefore, the RD has enough intelligence to discriminate between the 2 types of pulses. When you hold the button on junction A, a 140 msec pulse is generated. But since my RD wire was disconnected, the RD would not go in adjust mode.”
Still experiencing a delayed shift issue with my Ultegra di2 FD.
Question: Do I adjust (1/8th turn at a time) the screw marked LO or H?
Yes, I have gone by-the-book to: a) complete procedure for Adjustment Mode for both RD as well as FD – using lighted button of Junction Box A and b) ensured chain rides awfully close to inner walls of FD. Perplexed. Help. Thanks.
The mechanical adjustments have nothing to do with shift speed. You should check to see what the shift speed settings are in the customization settings, perhaps they are set to “slow”
Recently bought new 6870 FD + RD, 3 port JB, internal battery and going to use 6770 shifters. Plugged everything in on workbench and it worked fine. Thought I would make sure everything was updated and running the latest firmware so connected it up to etube and it started updating components but then the SM-PCE1 PC Interface Device fell off the bench and the cable unplugged and now etube won’t recognise the FD and FD now won’t work.
Tried updating the firmware of FD individually and also while connected to the other components. Checked all the cables and they are securely connected. Connected another 6870 FD and it works fine so it looks like there is now some kind of fault with my FD, is there any way of fixing it?
Hi Carlton, I have a 7970 set up with a 53/39 chainring. I have searched but cannot find anything about what it would entail if I were to change this to a 52/36 or a 50/34. Any help is appreciated.
Regard
Nick.
there in no such thing as a 7970 crank, so searching under that part number will find nothing, also there is no such combination of 52X36, and to have a compact 50×34 you need a different crank arm 7950
Model number FC-7900 130 mm
Front chainwheel FC-7900
A-53/42T, B-53/39T,
52/39T, 54/42T,
55/42T, 56/44T
FC-7950 110 mm
Front chainwheel
FC-790050/34T
Technical Service Instructions SI-1KY0A-002
CN-7900
43.5 mm
Crank arm length 165, 167.5, 170, 172.5, 175, 177.5, 180 mm
There most definitely is a 52/36 chain ring set, its called a mid or semi-compact.
http://roadcyclinguk.com/gear/evolution-chainset-rise-semi-compact.html#q1JFrfdjrwYlZ5pz.97
There is most defently NOT a 52×36 for a FC7900, yes for the newer FC9000/6800.
Read and understand before you dispute.
Apologies for questioning you, but if a guy wanted a mid-compact on a 7900, he could piece it together. In my limited interwebs searching I have seen a 7900 52T and 36T for sale separately, but not in a set.
A non Shimano 36 will work but will shift for shit as the inner and outer need to be matched A, B, E 52X36 is non standard. No apologies necessary
Search tricks you into thinking you’ve found a 36t for a 7900 when in fact, its for a 7950. Apparently Praxis makes it for the 7900 but I haven’t looked into it.
Thanks di2diy, I think I know what I meant to say. But just made assumptions. I have a 7900 at present.
Back onto my intended question, can I change to a compact 7950 without compromising the di2 setup? Or will I need to change any specific parts?
Also, are there any mid-compact setups I can use with my current 7900 di2 setup?
Thanks in advance. Much appreciated.
Nick.
If you go to a 7950 compact you will meet to lower the FD, but it will work. If you want to use mid to compact rings and be able to change just the rings buy a FC 9000, that will allow you to change to several combinations.
It may be cheaper to buy a new 9000 crank as Di2diy has suggested, or you can piece it together. I found a 7900 52t on amazon and the 36t is available on a lot of on-line retailers if you search. Maybe your lbs can get them also.
Definately found a 52t, but not a 36t so never mind. So Di2diy said, the 36t is available on the 7950.
If you go with a non Shimano ring the timing for the pickups will be off and it will shift for shit. The FC9000 is the best solution.
Could someone please expand/clarify/explain the phrase “If you go with a non Shimano ring the timing for the pickups will be off” – extracted from a recent post. What timing and what is pickups? I ask because it may be pertinent to my issue. Thanks
in short without trying to cover all the combinations… Shimano chainrings have a letter designation (type) for their rings, its has to do two things, the ramps/pickups and the locations for inner and outer teeth relationship (timing)… non shimano rings normally do not. For example FC7900 53×39 are both B, you can change the 53 to a 54 but its an E, and wont shift as well with the 39 as the ramps from the inner will line up differently, for a FC7950 50X34 both are F (also a different BC), the letters specify the timing for the ramps and teeth and its important to try and match the type for the best shifting. For the newer cranks series FC9000/6800 there are two letters for the type, for a 52X36 they are both MB for a 50X34 they are MA, 53X39 are MD, so when changing rings its important to pay attention to the type “letter” for the combinations. After market rings (non-shimano) can be used and did not make a big difference until Shimano released their 7900 cranks and made it possible to shift under full power, but on 7900 & 9000 series cranks it matters, mismatched rings will not shift as well under power and can throw/drop the chain. I know some people do ride different aftermarket rings including rotor/elliptical and seem not to complain, at least not out loud.
I have built a number of bike over the years and found that Shimano have it right when it come to making the best shifting crank-sets… when used as directed.
Have a bike with Ultegra 10 speed Di2 that will no longer shift. Was working fine, placed in storage for about 6 months. Checked it every other month and the derailleurs moved when the shifter was pressed. Then the battery lost charge. I just recharged the battery but now the system will not shift, front or rear. Tried the battery in another system, works fine, no shift issues. Took the battery from second bike, installed in first bike that will not shift and it continues to not shift. Conclusion – not a power/battery issue. Checked all connections, reseated the cable connectors using the tool, got the audible click when connectors were plugged in. Still no shift. Tried crash recovery mode, lights on junction box are correct but still no shifting. Any suggestions?
Hi John,
I had the same problem with my Ultegra !! speed Di2 setup. You could’t try to do a reset of you derailleur by pressing the the little button on the junctionbox for 5 seconds.
That solved my problem.
I think when you want to test you system once per month you realy have to rotate you cranck so you do have a real shift of your RD.
John Q,
be sure to remove the rear wheel when doing this reset so the RD can go through all the gears. Although I’m not sure this will fix the issue, its possible that the RD is in crash mode because you did not actually shift the RD and its jammed the servo.
Thanks for the suggestions but the issue persist. It will go into crash recovery mode but with or without the rear wheel, the RD will still not move. Nor will the FD.
I suspect the front junction. Do you have another bike with 6770 components you can test the FD/RD with?
I was able to obtain the diagnostic tool sold by Shimano. I ran all the connection test and confirmed that the battery/connection, upper junction box, shifters, and both derailleurs are functioning properly. Each of the test is run with a direct connection, not through the lower junction box. The test narrow the problem down to the lower junction box or both wires that run from the box to the FD/RD. Not likely that both wires are bad. The Trek Madone 5.2 has a reputation for eating up BB bearings, mostly water damage on this bike. I found moisture in the BB shell, around the bearings, and the grease was obviously water contaminated. I plan to get a lower junction box and retest. The box does not show corrosion but it’s a part that I can borrow and test with. Nothing to lose.
Sounds like you got it. I have found its hit and mis with the PCE1, some times it doesn’t find a fault even though there is a problem. If you were to try drying out the junction box wit a heat gun or a hair dryer you may be able to get the water out, clean out the ports wit a qtip and some alcohol, you may be able to get it to work. It’s also possible that the connectors were not seated completely and let water in. I have never had a JC 41 go bad but I guess it could happen.
I have an earlyish Ultegra Di2 system (about 10/2012) and have never updated any firmware/software on the system so I’m not sure which firmware its using but it must be early 🙂 I have bought a replacement rear derailleur RD6870 because I believed that with chain and cassette change I could replace my slightly creaky RD6770 10 speed unit. However the RD6870 refuses to be seen either with or without the FD6770 front mech connected. Is this solely a firmware issue with the rear mech or is it possible that the firmware in the rest of the system is simply too old? (ST6770 levers, SM-EW67 A Junction, Don’t know “B”Junction, SMBMR 1 Battery Mount and SM BTR 1 External Battery, FD6770 Front, would like RD6870 to work on rear)
So the short answer is yes it’s a firmware issue, but when you update the firmware the FD6770 will not work with the RD6870. To make your life easier buy a new FD6870, and if you buy from a LBS I’m sure they would be happy to update the system for you.
I was assuming that due to the age of my system it would be running firmware 2.5.0 or earlier as it has never been updated and therefore it would be capable of running FD6770/RD6870, silly ass – umption by me, what concerned me was that the 6870 didn’t even get recognised with the FD6770 disconnected so the firmware on mine must be about 1.0.0 🙂 Anyway rather than faff about I’ve gone for a complete upgrade FD6870, Int battery and SM EW90 Ajunction as well as a couple or three new wires, then with the SM BCR2 I can do my own “fine tuning” of the system, I’ll repost when it is all flying. Thanks
That’s the best choice in the long run, I know some have done the limited update to make it work with the 6770 FD but that is just for those who want to save a few bucks, and it’s really a wise man who spends the money to enjoy to the fullest. Happy New gear.
Carlton- have you ever taken a non-working RD-7970 apart to see what makes it tick – I picked one up for free just to test my DIY skills – It doesn’t react when you attempt a shift but it does react …slightly … when you initially plug the harness in to it- I have it apart down to the potted printed circuit board with motor and output driveshaft – next I will split the motor casing apart-can’t find anyone who has posted anything about attempting this-
Isn’t that how Bill Gates started out by splitting PC-DOS 🙂 ?
Pics please. Related, here’s the board of a 2015 SW-R600 shifter, after some soldering (ie. if inline images show up). Self-fusing tape added for protection and put inside handlebar. Works a charm, for shifting with a RD-6800.
http://i.imgur.com/LqewAZ3.jpg
Direct link:
http://i.imgur.com/LqewAZ3.jpg
What Di2 levers is this plugged into?
Plugs into a JC-41 in my case. Buttons (by Cateye) in pic shifts RD only and goes on the base bar of a tri bike, just behind the brake levers, one on each side. Works just as a SW-R600 obviously, ie. can be programmed as needed. Have regular tri shifters at end of aerobar extensions also, for FD and RD, but those are completely independent of this.
I wonder what is “Top position electrical adjustment” in Shimano manual for? I cannot get the gap between 0.5-1.0mm, it stops moving around 2mm. Is there something wrong?
I am considering fitting Di2 to my replaced frame Tandem, are there any areas I should be looking at , or is it a non starter and I should stay with mechanical. Happy to replace the group set ( well not happy but resigned that it may be necessary !) any advice would be grateful.
Go with the ultegra 6870 11 speed. Long cage RD if going biger than 28 in the rear.
Hey,
quick question for you. I recently bought a set of 6870 shifters and the rest of the gear is 6770, I’ve plugged everything in and set it up but nothing happens upon pressing the shifters. Do I need to update the firmware to make the shifters work with the rest of the system or will that setup not work on my bike?!
Thanks!
You will need to updat the firmware.
hope you can help. Have a problem with my Ultegra DI2 10 speed system. Previously had problem with external battery mount and got it changed, everything fine for a while, recently system dead again, so I thought change battery mount again, still no fix. read internet found could be problem with A junction. just changed that and inserted battery, system went green – me thinking on to a winner …but no. Try to change gear nothing. Thought that it might be in crash mode. press button and red light flashes turn pedals and it goes through gears ok. at end try to change gear again – nothing. Charge battery, do same again with same results. when I press any gear change button I get no indication of battery life (i.e. green or red light) but do get red light when pressing junction A button for micro adjust of put into crash recovery. getting me frustrated… also checked all connections are good
When you place a new component I think you have to do a system update.
If it’s any help Malcolm, I know the connecter was working ok on my system less than two weeks ago – you bought it from me! If the crash mode is working then the junction box is connected ok to the rest of the system and the problem would appear to be from the junction box back to the levers or the levers themselves, no green battery indication on holding down a changer button would seem to confirm this – I checked this on mine just before swapping to 11 speed so I know the junction box recognises the signal. Possibilities are 1, the connecters aren’t in properly – check them again, which lever holes are they in, I’m fairly certain mine were in the bottom connection, 2. the wires have been damaged but this is unlikely as you sound quite aufait with Di2 or 3. the levers/switches are damaged a bit unlikely for both to go together. I used 6770 levers on my system with really old firmware and there is a possibility that the EW67 junction box may need updating with newer firmware if your system is less than 3 years old.
Thanks for that Andrew (and the junction box). I agree that its unlikely that both shifters are goosed at the same time!!! I did make sure that the wires were seated correctly as got the “click” , but again I think they are in the top holes of the shifters (where the originals were), never thought about moving them. Again I would also think that the front mech would have worked at least.
Just a thought about anything electrical exhibiting intermittent problems:
Check (bench-test) continuity of each wire. Wiggle the wire while Ohmmeter prongs are attached to each end. This, to catch invisible, internal breaks in conductor.
Ok got another question, can you use the three port A junction (EW-90A) with the external battery set up. I.E. if I change out the old style A junction (EW67) and replace it with the 3 port along with two cables to the shifters, would it work?. The main reason is that the Ultegra system is on my training bike and I have another which has full 11 speed Dura ace with the internal battery. That way I can connect my existing cable for firmware upgrades etc without needing to spend the £160 for the PCE1 tool
Cheers guys
Last weekend I removed the EW67 and replaced it with the 5-port A box on mt external battery 11 speed Ultegra setup. I do have the PCE1 tool but I don’t think it did any firmware updating when I plugged everything in.
I have a 2013 Specialized Roubaix with 10-Speed Ultegra Di2 6770 and an externally mounted battery. My LBS has complied with all of the Shimano software/firmware updates. Is my system compatible with the Shimano D-fly accessory? I would like to pair it to my new Garmin 520 if possible. Also is my 10-Speed Ultegra 6770 Di2 system the same as what Garmin refers to as 6770 E-tube or are they apples and oranges? Thank you very much!
Yes it compatible. You need to add the Ant+ broadcast module. And yes, your 6770 Di2 is the E-tube version. (The original Di2 was not e-tube.)
Thanks for getting right back to me! Is the Ant+ Broadcast module you mentioned, the same as the Shimano D-fly accessory?
Specifically, it’s the SM-EWW01 ANT Wireless Broadcast Module.
i have bought a cube lightning 2016 with full ultegra di2 internal cable. Then my mechanic swapped all the group set not the (cable) to my bianchi oltre with dura ace 9070 external cable. The new ultegra 2016 shifter does not work with the old dura ace 9070 external battery cable system. But the old Dura ace 9070 shifters works on the new internal cable ultegra system. Can you please give me some advice. Thanks.
Update the firmware.
my mechanic already updated the firmware of the dura ace 9070 external battery system. But still the new ultegra shifters with internal battery seat post does not work. But if we put back the Dura ace shifters to old 9070 external cable system in combination of the new ultegra di2 components it works perfectly.
Update the whole system including the shifters.
carl,
Update the shifters [as Di2diy advises] and the system together.
Don’t know why your ‘mechanic’ did not update everything on the bike and return it good to go.
So looking at building a CX bike with Ultegra Di2 (ST-R785, RD-6870-GS). Just looking for a 1×11 set-up so no front derailleur. Would rather do a 1×10 but can’t seem to find a shifter hydraulic set for that. What additional components would I need to complete the setup?
My prior set up was Ultegra 6870 with external battery. I just installed my 6870 derailleurs/shifters with SM-BTR2 internal battery and EW90-B junction box. I updated firmware for older components. Shifting/charging work ok. Issue I have is battery indicator light does not function when I push shifter. Troubleshooting ideas or suggestions?
Hi
Can I run just the rear DA 9070 rear mech and gear change unit with a single TT chainring set up? I Do not require the front mech or gear change unit.
Many Thanks
Jon
Will a 10 speed 105 crankset shift properly as the ultegra and dura ace?
All things being equal, the 105 is a good crankset. It should shift smoothly.
It does differ, obviously, from the Ultegra [currently my component level of choice with Shimano ] and Dura Ace [ I do have some DA components as well ].
Much of the marketing between 105, Ultegra and DA components is about weight and much of it negligible. I do run a Di2 Ultegra ‘long cage’ RD with DA FD and other components for my hilly rides. I use the long cage to keep the large cassette happy on the back.
105 is good, Ultegra is better, Dura Ace unnecessary for most riders, IMV.
My Ultegra 6870 Di2 shifts badly since a service at my Local Bike Shop (LBS); rear derailleur hesitant to shift & sometimes downright reluctant. Mechanic at LBS rode bike, says shifting crisply & problem when I ride could be because I weigh only 66kg and he’s considerably heavier. He says lighter body weight can make shifting slower. Sounds like garbage to me; what do you think?
Mate, use another Mechanic in the future. Meanwhile, take it back. That system should be super smooth and almost noiseless. It could be various things but if you have paid the guy to do a job then make sure he does it.
If the result is poor come back to the team here; the issue will be sorted, I’m sure.
I bought a new bike that had the a RD-6870-ss and an 11-28 cassette. I swapped out the RD with a GS and changed the cassette to a 11-32. I’ve followed the manual for adjusting the RD. I’ve maxed out the outboard adjustment, but I’m still getting a small amount of rub on the inside (meaning it rubs on the larger cassette). Do I need a spacer between the hanger and the RD?
You don’t say what bike you have. However, assuming your drivetrain is all 11-speed you should no issues with the set up.
Follow the Shimano set up manual slavishly and you should be good to go.
Make sure you set up the mechanical side [B-tension adjustment bolt] of things BEFORE you set up your Di2 adjustment for the GS cage. Also, make sure you have torqued the RD to the hanger correctly without any fouling and at the proper torque [8.0 – 10.0 N·m / 70 – 87 in. lbs].
NO SPACER on the 11-speed cassette.
It is rare, and you should not need it, but I have come across guys having hanger issues and overcoming this with a longer B-tension adjustment bolt bought from their local LBS or a stainless steel equivalent from their local hardware store.
You can eyeball the upper guide jockey to see if you have the recommended clearance [2-3mm].
I say again, if you are following the manual you should have no Di2 problems. Di2 Roks.
Hope this helps.
I’ll run through the setup again. It’s a Specialized Roubaix if that matters at all.
i have di2 ultegra shifter & d-fly wireless & 5 porth junction box and the garmin 810 detecte gear is good , right & left shifter button on top no scroll page left or right what this problems please let me know
I have a 6770 10 speed groupset but the rear derailleur is broken. I have put a 6870rd and a fd-9070 but neither work i.e. no life. I have upgraded the cassette , chain crank to 11 speed. Do I need to upgrade the shifters and the 3 port junction as well?
Phil, your answer is clearly described in the article above. You need to upgrade the firmware.
I recently updated a battery&mount to latest version along with 6870 group….all works fine. Took same battery/mount and plugged into a 6770 group that has not been updated(and that group may or may not be on all same versions)and things don’t work right with that battery/mount but DO work fine with existing non updated batt/mount…..is this normal? No mash ups here so is there any reason NOT to update all things to latest versions?
BTW thanks for helpful site!
You should update all of your components to the latest firmware. If you ever want to upgrade your 6770 to 11-speed, replace both the front and rear derailleurs (and the rear cassette, etc.) It’s pretty much impossible to do a rear derailleur-only upgrade to 11-speed any longer due to everything coming with new firmware — that would have been the only reason not to update firmware, and it’s no longer an option.
Firstly, thank you so much for all the information on Di2 and how to upgrade! Well done. I’m looking to upgrade my Ultegra Di2 6770 system to the Ultegra Di2 6870 with GS RD to get a little extra gearing for hilly rides. I think I understand that to do so, I just need to switch out the RD, FD, chain and cassette, but will my existing Ultregra 6750 Compact crankset (50/34) still be compatible, or do I need to switch that out as well. I’m still investigating whether my existing wheels will take an 11-speed cassette, or if I can change the free hub as well.
Thanks
Harris, Shimano do not advise mixing your existing 6750 crankset with upgraded 6850 RD/FD. This can be done in an emergency if you want to FORCE 10-speed and 11-speed dynamics but mixing 10-speed with 11-speed geometry chain-gates, pickup dynamics etc., will give you issues. Ultegra is a great drivetrain and the GS will enable you to run a 32t cassette. Mixing some 10 and 11 speed components is possible if you like noise, excessive wear, and an all round miserable experience.
Advice? Swap out your crankset for the 11-speed Ultegra.
NOTE: There is a some difference in gear-change-experience when running an 11/23t cassette compared to, say, a 12-25t. However, you will climb like never before when running the big ring on the back with a compact crankset on the front.
NOTE 2: Keep in mind that descending with a compact might find you ‘spinning out’ due to the smaller front rings [compact]. Perhaps, a semi-compact would be a better choice unless you are climbing +12% hills. This is particularly so if you are needing to upgrade your crankset anyhow. Also, as you are needing to upgrade your crankset, give some thought to the arm length. Make sure you do not go too small and loose leverage or too long and so punch your gut with your knees or knock your bars on big hills or increase dead spot bumps on rotation.
NOTE 3: If you are installing the RD yourself, make sure you adjust the B-Tension bolt correctly. Too far can cause chain-skipping on torque. Too tight will cause the upper jockey wheel to foul and hinder gear changes into to larger rings. Follow Shimano’s advice carefully and you should have a silky smooth hill-conquering drivetrain.
Hope this helps.
I respectfully disagree with the comment on chainring and crank compatibility. I have run a number of combinations of 10 speed chainrings and cranks with 11 speed systems, and simply put, I would defy anyone to tell the difference in shifting quality. They are all fine. In fact, I tried to measure the physical differences between 10 and 11 speed rings and cranks. The thicknesses at the teeth are exactly the same (as one would expect given the inner dimensions of 10 and 11 speed chains are identical). Since the tooth pitch is exactly the same as well, exactly what do you mean by “chain gates” and “pickup dynamics”? My recommendation is to save your money and use your existing crankset. As for gear ratio, given that you are already running the compact, there is no difference at the top end to give you the “spinning out” problem. Go for it!
Respectfully,
This is a user problem.
As many have, I have run both drivetrains for many years. However, to ‘save your money’ simply refrain from upgrading.
Of course, there are always components that can be ‘mixed’ against the manufacturer’s advice, but there are issues.
FACT 1: FSA’s Technical Manager [Jeff Donaldson] comments;
We…don’t consider the N10 to be forward compatible to 11-speed
FACT 2: SRAM/Quarq’s Dan Lee comments:
Ten- and 11-speed should not be mixed. Our 22 groups actually have the chainrings slightly farther apart than our 10-speed groups… the chain and front derailleur are specifically designed to work with that gap. Running a 10-speed chain on 11-speed rings or an 11-speed chain on 10-speed rings could cause chain jams or derailments.
For the meaning of chain-gates and pick dynamics see Shimano’s technical documentation online or email their technical team.
As for ‘spinning out,’ a smaller ring on the front [compact] will spin out long before a larger ring crank needs no remark, surely.
Harris, Shimano, FSA, SRAM do not advise mixing 10 and 11-speed drivetrain components. This advice is good and for good reason. But you can ignore it.
Your quotes are not exactly relevant since we are talking about shimano rings here. And my experience is based on real life use, as well as many others on other forums where this question frequently comes up. The manufacturers have a commercial reason for pushing you into purchases. Shimano in particular has a long history of stating components wont work together, when in fact they do. Please provide the link to the shimano technical documentation concerning chain-gates and pick dynamics, you are referring to. In any case, it doesn’t hurt the OP to defer the crank purchase and try it out before committing to the crank upgrade.
I have two 6870 Di2 11spd bikes that I have upgraded from 10 speed and still use 10 speed cranks/chainrings. First bike runs a Quarq with Praxis chainrings (huge shifting improvement over standard SRAM chainrings) and second bike runs 6700 Ultegra cranks/chainrings with no shifting issues. I have ridden other 11 spd Di2 bikes with full 11 spd groupset and cannot tell any difference in the shifting.
Shimano/SRAM/FSA are just trying to extract more money from consumers saying they *have* to upgrade
I’m with Bob on this, a 10s crankset will work perfectually with a 11s setup, the inner and outer ring spacing is a non issue ramping is identical, however compact drivetrains just do not shift as well as standard (53×39) imho. The only reason to dump the CS6700 for a 11s crankset is because you can go from a standard to mid, or compact without changing crank arms.
Thank you all for the great response to my question. I was trying to avoid upgrading the crankset, as I do have a 4iiii Precision powermeter installed on the non-drive-side crank arm. I guess I could move the old crank arm over to a new crankset, but was trying to avoid that. The other option I have been looking at is having the Ki2 derailleur mod done to install the longer cage on the existing 6770 Di2 derailleur, which allows you to run up to an 11-36 cassette.
When I priced it out, it’s about a $10 difference between modding my 6770 or installing the 6870 without a new crankset, so figure I might as well upgrade and then either sell the 6770 kit or see if I can transfer it to my cross bike at a later date…
I changed from 10 to 11 speed a couple of months ago, swapptd everything except 50/34 6700 crankset and have had absolutely no problems. Front shifting is slightly quicker due to firmware upgrade alone, rear shifting is silky smooth.
I’m aware of the firmware upgrades that eliminate compatibility between 10 and 11 speed electronic components but does anyone know if you can go backwards- Using a FD 6870 with an otherwise 6770 system?
Short answer is, if its a newish FD6870 with version 2.6 firmware or above then no, if it has 2.6 then you can “backdate” it if you have the Shimano interface. If it is version 3 firmware then no again AND you can’t backdate the firmware either.
Thanks Andrew- that was pretty much what I figured. I’ll have to hunt down a 6770 der then. The 6870 is less expensive so I was hoping to just buy it instead.
I went down that road with the RD6770 to 6870, ended up buying everything but the crankset and some wires, good news was yep you’ve guessed it, 6700 kit goes for a premium on ebay these days, got more for FD and RD than new 6870 kit, overall just about covered my outlay – after ebay fees – so might pay to upgrade all especially if you need new chain and cassette like I did.
6870-FD Microadjustment – has anyone got this to work. This is explained on page 57 in the Dealer manual. When attempting this – the FD simply does not respond to the switches. I have a system that was upgrades from 10 speed 6770 to 11 speed by replacing both front and rear derailleurs with the 6870 versions. I have seen on other forums that several others seem to have this problem – but can’t find a solution posted anywhere. Would this be something that needs a firmware update to work? I have not upgraded the firmware after replacing the 6770 derailleurs with 6870s. Shifting works fine but I am getting some chainrub at the front in the 1st/2nd cog and big ring combo. FD limits are correct and alignment is ok.
Yes you will need to update the system to get this function to work. However I have found this function of little use and only affects the range during the shift, but does not seem to effect the mechanical adjustment much if at all. Also some/most bikes due to chain line you will always have rub in the two extreme combinations. To make matters worse if you are using front rings with 10 speed spacing it will exacerbate this condition.
Are there different cable lengths available from the shifters to junction A? Had an recently upgrade to Ultegra Di2 completed and the extra cable hanging below the handle bar is very irritating.
I’m assuming you’re using 6870 Ultegra with the seperate cables to the front junction box, if so then yes the cables are available in lengths from 300 mm up to about 1500mm with suitable steps in between, in the UK either Wiggle or Chain Reaction do them for about £12 – 15 online each, I used 400mm on mine at the front and they turned out just about right, obviously depends on the width and design of your bars and stem.
With reference to Andrew’s reply below, if you don’t already have one, you’ll need the di2 wiring tool (TL-EW02) they’re about £3 in the UK.
Hey there,
I think it was discussed sometimes ago but I couldn’t find it in older comments. Sorry for asking again. My current setup is 6870 front/rear derailleurs, 6770 shifters with SM-EW67-A-E junction box and SM-BMR1 short external battery under BB. My new frame Argon 18 Gallium pro. As far as I see it doen’t has holes for external battery mount. (under BB or chainstay). An option is to buy a SM-BMR1 with long battery mount and have it installed with downtube bottle cage holes. Or I can try to revise my setup with internal SM-BTR2. In this scenario which part do I need to chage? a new battery and junction box and etc..
many thanks for your replies and apologies if I double same topics.
To use a BTR2 you meet to change the EW67-EW90, buy cables to the shifters to EW90, buy cable to junction B to battery, buy a battery and charger. Or buy a internal battery kit from me and you can use everything you have without changing any thing. My kit includes an in-line charger and is plug and play. See my ebay listing, my user name in “eapathome” you can buy it direct from me or on ebay. Just be aware I’m in Europe now and will be home from 3/29-4-1, and than back here, so let me know if you want one.
But it says “Since the February 2015 firmware update, the older SM-EW67-A-E Front Junction A is no longer compatible with the BTR2 Internal Battery.”
How am I going to use it with your kit without changing my current EW67?
That’s if you use the Shimano battery, if you use mine it will work with your setup the way it is, with the EW67.
Okay, thanks in advance. I let you know when I got my new frame.
Hi good people of this forum,
Has anyone had this problem before, just started yesterday. I have the DI2 11 sp, it came pre fitted on the bike, never had a problem. Now if I put it in the small chainring, I am unable to change gear at the rear, but if I put it in the big chainring, it works fine can change gears at the rear. The battery is showing fully charged. I have the SM-PCE1 (pc linkage device) so will run a check. But just wanted to know if they was something specific I should do (ie a certain update)
Many thanks for your help
Greetings, Barry:
I have the same set up as you, on a Specialized ROUBAIX purchased new, November 2015. Have not, in this relatively short time, experienced issues you mention. Sometimes, when I felt shifts not to be very smooth I doubly verified DI2 specs for mechanical adjustment/clearances. Have never hooked up to software, assuming dealer had attended to the necessary.
It is evident DI2 wire-connections are delicate, requiring a special tool for connect/disconnect. Irrespective, contacts are susceptible to wear. So, I tinker not with electronic hardware. One, significant observation: too frequent shifts do affect smooth transitions on MY bike. Only guessing, that is due to build-up of electrical resistance caused by temperature change within the circuitry.
My suggestion: Put your bike on a service stand. Start off cold. Wiggle the connections while shifting. Good luck!
Never had this happen to me but for what its worth, I would personally rule out any suggestion of the fault being down to dicky connections to the rear derailleur as it works fine on the big chainring and there is only1 cable feeding it. I would lean more towards it being a fault that lies within the main electronic control circuit in the battery mount, especially if it is external and subject to damage/water/dirt attack by the elements. As you say, the next obvious check is through your PCE-1 which may identify the problem. Not much help I know, but good luck.
So much awesome information on this site. I was hoping you may be able to help me with this problem.
I have a new TT bike with Dura Ace 9070 as standard. The bar end shifters that came with the bike are the single button variety that only changes the rear gears. I was wondering (before I shell out more money on the double end shifters) if there is a way to reprogram the single shifters so that they could change the FD? E.g. hold both buttons down to change FD.
Thanks
can i take off my 11 speed dura ace di2 (current model) and simply replace it with a medium cage ultegra Di2 if i wan to fit an 32 ultegra cluster? off to the Alps and need a granny gear. Tried fiddling the B screw and reversing it but just not enough clearance
thanks
Yes you can. You also need a longer chain.
Your Dura Ace needs to be of the new type or else you cable won’t fit.
On the side of the SM-EW90-A 3-port Junction Box there are 2 terminals which are covered by a square rubber flap. Can these be used to connect the SM-PCE1 interface?
No it’s for the charger for the BTR2, PCE1 has a round plug and can plug into a shifter port or to a component.
Can I charge my internal battery using the pcme1 or can I only use the special charger for internal battery
No you cannot charge the battery with a PCE1, you need a BCR2
Hi Carlton, lots of interesting stuff here but sadly nothing to help a very new DA Di2 user. My upgrade kit (new just before Xmas) comes with multi shift of the RD which I don’t like. My reading is that the default setting should not do this and of course I updated the firmware when I installed the kit. Was this a revision to the single shift? If so how do I return it to single cog shifting? Incidentally I use a Rotor crankset with Q rings: the FD works perfectly. Regards, David
Within the software tool that updates the firmware there are settings to change the shift settings, it’s in the customization menu.
Thanks for the very prompt reply: is that with SM-PCE1 or SM-BCR2.
The Shimano e-tube Windows-based software is compatible with both the SM-PCE1 and SM-BCR2. It’s a free download http://e-tubeproject.shimano.com/
You can either disable auto-shift all together, or you can increase the delay between each auto-shift. You may find that you prefer to leave auto-shift on after increasing the delay time between shifts.
Done that, seems to have worked and was easy. I’ve ridden Sram for years and now I have shifting that works close to that. Many thanks, David
Hi, Last year I upgraded my Ultegra Di2 10 speed to 11 speed. I used the externel battery. After a while I got problems with shifting both my front and rear deraillers. I checked everything and posted my problem here. At the end I changed my external battery for an internal battery and did a reset of my rear derailler. Now I have the same problem again. A few weeks ago I went to my local bike store to solve a little problem with my rear wheel. When I left the store and went back home after a few miles my Di2 system stopped working. The battery was not empty.
At home I tested the system with the interface for the internal battery and the pc reported no problems. After that I have made a few rides that went well. Now I have the same problems again. Neither my front or my rear derailler will shift.
I changed the 5 port junctionbox for a new one and the problem was not solved.
I don’t know what I can do else to solve the problem. Does anyone have a good tip for me.
I forgot to menton that I also changed al cables and the internal junctionbox.
Can someone tell me what ST / SW stands for?
Someone please correct me if I’m wrong but if you are referring to the prefixes for Shimano part numbers, I don’t think they relate to any specific words as such, other than a loose link maybe, for ST to STI (Shimano Total Integration) for all levers and SW for all Di2 SWitches. Purely guesswork guys.
If you look on the E-TUBE compatibility chart, http://e-tubeproject.shimano.com/pdf/HM-CC.2.11.1-01-EN.pdf there is a section labeled ST / SW. I was curious what this stands for.
Thanks
I am new to this forum and have recently finished finished building and setting up a Shimano system based on a Colnago frame. I have used Di2 RD 9070 and FD 9070 front and rear derailleur actuators on a CS-9000 11 speed cassette and FC-9000 172.5 MM 39/53 Crankset. All-in-all very happy with the final result after initial setting up. Changes up and down are fast and silent at each end and the system runs with very low noise, with the related benefits to performance. So very happy overall apart from one odd glitch: the downshifts from the top cog (11) will simply not move to 10 following one change command. It always requires a second shift command to go to 9. But will then happily shift back up to 10. Has anyone else come across this issue? Maybe it is my relative lack of experience at setting up? Mechanically I believe the H and L stops are set correctly but maybe some fine tuning required? Or maybe its firmware? Should I upgrade the firmware as a first step, or can anyone offer another idea/check/solution first? Thanks for any help and advice.
Hi Graham,
As you can see from the many comments here making sure your firmware is current is always a good 1st step when isolating problems.
Have a go at that solution before changing tack.
We love Di2!
I’ve experienced this problem. Your electronically adjustable alignment is most likely a “few clicks” too wide.
Thanks to James and Carlton. I am in the process of acquiring the right equipment for the firmware update so will sort that later. Sadly that bike is in SW China and I am in NW China just now so will not be able to recheck the electronic alignment until I get back there. One of the challenges of living and working here. I assume by that alignment you mean the trim setting on the 5th cog as described in the article? Maybe its not quite in the optimum position? Also I had to acquire the parts from different sources too, so there is no guarantee that the firmware levels match completely out-of-the-box. Anyway I will recheck and report back here for completeness. Thanks again.
Yes, the fifth cog trim position is what I was referencing. That should fix your problem. Good luck!
@Graham Bannerman
Based on recent experience purchasing heavily discounted ‘world renowned’ name-brands in Shanghai and in Hong Kong, I’d be leery x 2 buying stuff in China :). In my case, packaging and specs were right on but performance way off. just saying and you’d probably agree.
carlton.great reference site. ???? IS THERE ANY SIMPLE WAY TO UPDATE Di2 FIRMWARE ON A MAC (OS X)??????
appreciate any advice. cheers. Tony
No, E-tube works only under Windows.
Actually the it is incorrect to suggest E-tube cannot run on Mac .
All my customers Di2 systems are addressed on a Mac.
To run E-Tube software on a Mac you must run Windows on your Mac. The most trouble-free way to do this is to have a dedicated hard disk with Windows installed on it. This is my standard practice.
The other, more problematical way, is to partition your hard disk and add a Windows partition and run the E-TUbe software on that partition.
In short, YES you can run E-Tube on your Mac. No, you cannot run it on OSX. YES you can run it on your Mac but you must be running Windoze [preferrably Windoze 10]. Spelling for humour!
HI Carlton, great page.
Do I understand that as long as I don’t update my 6770 Di2 with new firmware I can use a 6870 rear mech with my 10 speed set up?
You’ll probably find like I did that the 6870 rear mech has V3.5 or thereabouts firmware and won’t work with the rest of the 6770 kit which is on pre V2.6 firmware. I had to replace front mech, front SW67 with SW90, new wires to shifters and new internal battery. If you can get a second hand rear mech (6870) with old firmware you might be able to do it, you can’t backdate V2.6 or later firmware to earlier either.
Good news is that 6770 kit goes for really good prices on ebay 🙂
Hi, my wife hs the Ultegra 11spd and it has been working fine. Did a very wet triathlon yesterday but was shifting fine throughout the bike section and then picking the bike up the front mech has shifted into its lowest position and refuses to shift, battery is fully charged but still won’t shift. Its all internal and removing the seat post etc doesn’t show any water. Any ideas?