Easier than Building Yourself: Buy a Replacement battery from ProntoWizard.com
You can order replacement higher capacity (900 mAh) battery packs from ProntoWizard.com. These battery packs have almost twice the life of the standard battery packs. They are fully assembled and ready to use.
My NiMH Battery Pack Replacement Procedure
I attempted to replace the NiMH AAA batteries within my ProntoPro battery pack. The procedure is the same for both the standard Proto with AA batteries and the ProntoPro with AAA batteries.
Unfortunately, I was unable to get the battery pack to work with the ProntoPro, perhaps due to it producing lower voltage than the Philips battery pack. The batteries charged fine but only reached 4.8 V as compared to 5.2 V or more for
the stock Philips battery pack. There could have been other assembly issues as well.
The battery replacement procedure is the same for the standard Pronto and several people have reported success with the AA battery pack. Since the replacement process is the same, I’ve made an instructions page on how to replace batteries within the pack. It should work fine for standard Pronto battery packs but non-standard batteries would be required for a ProntoPro.
Instructions
Below is the ProntoPro battery pack that contains 4 AAA batteries connected in series. This is very similar to the standard Pronto battery pack that contains 4 AA batteries in series.

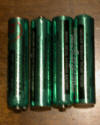
The batteries inside the battery pack can be replaced with standard NiMH rechargeable batteries. If you want to mail order high-capacity rechargables, I suggest Thomas Distributing � they sell AA batteries with solder tabs and the latest high-capacity versions. If you want a local source, Wal-Mart sells Enegizer AA rechargables for about $12 for 4 batteries and RadioShack sells AA and AAA 4-packs for about $18.

Cut the plastic covering from around the Philips battery pack.

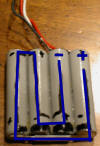
This will expose the 4 batteries as shown below. Note the white wire with a ?resistor? in the wire sensing battery charge/recharge state.

The batteries are connected in series, as shown below.

You will need a soldering iron to solder wires to new NiNH batteries before connecting. I recommend the RadioShack dual heat soldering station. Set it at 20 watts for working with the batteries or other electronic components – 40 watts is too high.

The batteries will be arranged in series in final form, as shown below.

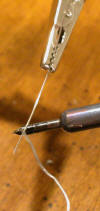
Hold the soldering to the battery. You will have to heat the surface of the battery before solder will adhere to it. Don’t solder the soldering tip, make sure the solder is on the battery. Make a round bead of solder to be used in the next step.
I placed a little solder on the wire but this step is not necessary.

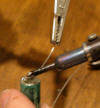
Heat the solder bead on the battery so that it melts and place the wire into the solder.

After attaching wires to both ends of all batteries, they should look like this:

Now solder the batteries in series as shown in a previous diagram. Remove the wires from the Philips battery pack by pulling them off – de-soldering is not necessary. Solder the wires onto the same locations on the new battery pack. Wrap the pack in electrical tape.


The ?resistor? is most likely a thermistor to sense the heat of the pack. NiMH cells can only be fully charged if the charger can sense the temperature of them. Also, flat “bars,” or even desoldering braid work well for connecting the cells together. They carry more current for their thickness than normal wire and solder better to the batteries.
Is there somebody that knows or is able to give some description of that thermistor? What kind of a thermistor is it? Thanks!
It is a 10k glass thermister. What isn’t shown is the inline MF-LS180L PTC that is attached at the bottom.
I can’t tell from the picture where to solder the white wire. I’m guessing the same spot as the red wire. My second hand Pronto didn’t come with a battery pack to use as an example. Thanks
I can’t remember for sure – that was a long time ago and the pictures weren’t great. I think the white and black wire are soldered to the same location. The only difference is the resistor / diode / circuit in the white wire at the point where it connects. I remember it was there, but have no idea what it was.