Dish Remote Troubleshooting Steps
- Search the Code Listfor your device; try all codes that look like they describe your equipment.
- If this does not work – do not ask me if I have the code you for your device. If there is no code listed, I don’t have it. Instead, perform a code scan.
- Perform a Code Scan, where the Dish Remote control scans every code it contains to see if one of them causes your device to respond. Instructions are on the page below.
- If this does not work, your only choice is to. . .
- Purchase a Learning Universal Remote Control that can learn the codes for any device you have. A list of recommended remotes is shown below.
Universal Remote Control Recommendations
Beware! Many low quality learning remotes can’t learn the 57 kHz IR signal that the Dish remote control uses. This is the cause for many remotes not being able to learn Dish codes. Recommended remotes are below:
Best remotes by price range:
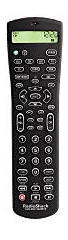 The best inexpensive learning remote for Dish system, or any other, is the Radio Shack 15-2116 ($30). It is similar to All for One remotes (and it manufactured by the same company) but this version has a backlit keypad. If you really want to customize these remotes, build or buy a JP1 cable and download your own files to these remotes.
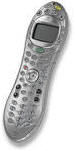 The Logitech Harmony remotes cost between $80 and $140. These are very powerful and very easily configured via a PC and the Harmony website. Just input the make and model of your device and the correct codes are automatically identified. The correct inputs are automatically selected on all devices through a setup wizard. A powerful and easy remote.
If you’re looking for a high-quality universal remote control, I suggest you visit the Remote Central web site. There are discussion forums on everything related to remote controls. A large number of remotes have been released in the past year. Click here for an excellent table comparing the models.
Programming your Dish Network Remote Control

Important Note:
If you can’t get a “universal remote” to control your Dish Receiver, it’s probably because it doesn’t have the correct remote address code set. If you can’t get your Dish remote to control another device, it’s probably because the Dish remote is missing the codes.
The only solution for either of these situations is to get a true, code learning universal remote control.
Index
Remote Control Manual
How to program devices into the Dish Network remote control
How to perform a Power Scan to search for devices
How to determine the current remote control settings
How to change the remote address of you Dish Network satellite receiver and remote control
Television device codes
VCR device codes
Amplifier device codes
Cable Box device codes
Dish 500 Remote Control Address
Links / Mirror
Remote Control Manual
The operators manual for the Dish Network remote control is available here in Acrobat format (remote.pdf, 378 kb). Adobe Acrobat Reader is required to read this file. This acrobat file is also available on the Dish Network website.
Programming Device Codes
The Dish Network remote can be programmed to control up to 4 devices:
- SAT Mode: Satellite receiver
- TV Mode: Television
- VCR Mode: VCR
- AUX Mode: Amplifier, Receiver, second TV, second VCR>
How do I program my remote control?
For remotes that have blue arrow and Select buttons and 4 separate mode buttons (SAT TV VCR AUX):
*If you start this procedure and at any time do not press a button within 20 seconds, the remote will end the procedure automatically. Simply start over again.
- Press and hold the desired mode button (about three seconds) until all mode keys light up, then release.
- Use the number pad buttons to enter the three-digit number corresponding to the equipment (click here to view remote codes). The light will blink off after each digit is entered and then return to a steady light.
- Press the POUND (#) button. If the code entered is valid for the remote, the mode light flashes three times.
- To verify the code works, try several functions for that equipment.
For remotes that have one Mode button at the top:
*If you start this procedure and at any time do not press a button within 20 seconds, the remote will end the procedure automatically. Simply start over.
- With the desired equipment on, press and release the Mode button until the light flashes behind the correct mode.
- Using the tip of a pen or the eraser on a pencil, press the address button.
- Enter the code (see links to find your code below) on the remote’s numbered keypad for the equipment.
- Press the Address button. If the code entered is valid for the remote, the mode light flashes three times.
- To verify the code works, try several functions for that equipment. Some codes may provide partial functions or respond differently than the button’s titled function. Try the other codes listed for that device until you find one that offers more complete functionality.
Click here for codes for remotes with blue buttons, gray buttons, and platinum (DVR) remotes.
I have tried all the codes to program my remote, what else can I do?
- Turn ON the electronic device you want to program the remote to control
- Find the brand name of the device in the device code tables below.
- If there is more than one numeric code listed for the brand, try each until the remote is able to control the device. If several codes power on the device, try all of the buttons for each code to find which one best controls all of the functions of the device.
- Press the Mode button on the remote until the remote is in the mode for the device being programmed. (The light corresponding to your device will be the last to flash.)
- Use the numeric key pad buttons to enter the first code listed for your device in the tables below. The mode light will stop flashing and stay lit.>
Note: If you are entering a code for the AUX mode, you must enter a 4-digit code. The first digit indicates the device type:
0 – indicates a second TV
1- indicates a second VCR
For example, to program the AUX mode to control a Sony TV, enter a 0 and then 000.
If you are programming for an amplifier, receiver, or cable TV box, the codes in the table below include the first digit.
- Press the Address button to save the code. If the code you entered is valid for your remote, the mode light will blink 3 times.
- Test if the code works for the device by pressing the Power button. If the code is correct, the device should turn off.
- Turn the device back ON and try some other functions to make sure you have the correct code. Occasionally the Power button may work when other buttons do not.
- If the code works, then you can stop here. Write all of the codes you programmed on to the sticker that came with your satellite receiver and apply the sticker to the inside of the remote battery cover.
- If the code you entered does not work properly, repeat the above steps, using another code from the table. If you have tried all of the device codes without success, try using the following Power Scan procedure.
Remote Code Power Scan
If your brand is not listed below or if were were not able to get the listed device codes to work properly, use the following procedure to scan through all codes. If/when the remote scan scan reaches the correct code, the device (whether a TV, VCR, or other) will turn ON or OFF. When this happens, try some other functions to make sure you have the correct code. Occasionally the Power button may work when other buttons do not.
Note: If you start the procedure and at any time do not press a button within 20 seconds, the remote will end the procedure automatically.
- Turn ON the electronic device you want to program the remote to control.
- Press the Mode button on the remote until the appropriate mode light is flashing.
- Press the Address button. The mode light will start flashing slowly.
- Press the Power button. The mode light will stop flashing and stay lit.
- Press the Up or Down arrow button to set the remote to the next code. The Down arrow button scans backward and the Up arrow button scans forward.
- When the correct code is reached, the device (whether a TV, VCR, or other) will turn off.
- Press the Address button to store the code in the remote control memory. If the code is valid for your remote, the mode light will blink 3 times.
- Turn the device back ON by pressing the Power button.
- Try some other functions to make sure you have the correct code. Occasionally the Power button may work when others do not.
- If the other buttons work, follow the current settings procedure below to determine the current remote settings.
- If the other buttons do not work, repeat the previous steps. The scan will resume from the last code stored.
- The mode light will flash rapidly when the scan has returned to the starting point and all codes have been tested for that mode. The remote control may not control some device models.
Alternative Info:
If the codes provided do not work, you can try a Power Scan. Here are some simple tips before you begin:
When starting a Power Scan after previously entering the code manually, first reprogram the remote to 500 using the remote for a TV or VCR or 0000 for the AUX mode. This will give you quicker and more consistent results. Once the device powers off, press the # button or the address button depending on the type of remote you have. Manually turn on the device you are trying to program before you begin the Power Scan. If the scan powers the device off, but does not give full function, re-start scan mode and continue (for example, there are dozens of RCA TV codes). Not all devices are supported, and many will only give you basic functions. If performing the Power Scan correctly then it should not take more than six minutes to find the code.
If you are performing a Power Scan in AUX mode, the steps you should follow are below:
- Hold down the AUX button so all buttons light up.
- Enter in prefix 0=TV, 1=VCR, 2=AUX device (i.e., DVD, stereo amplifier, etc.).
- Press the * button.
- Press Power then press the Up button ike you would with a regular Power Scan.
- Once the device powers off, press the # button or the address button depending on the type of remote you have.
- If you start this procedure and at any time do not press a button within 20 seconds, the remote will end the procedure automatically. Simply start over again.
Determine the Current Remote Settings
You can find out which code is currently set for each remote mode.
- Press the Mode button on the remote until the appropriate mode light is flashing.
- Rapidly press the Address button twice.
- For the SAT mode, the mode light will flash the number of time that matches the receiver address.
- For the TV, VCR, and AUX modes, the mode light will flash the number of times to indicate each digit of the current code. There will be a pause between the flash sequences for the digits. A quick flash indicates zero.
- Write all of the codes you programmed on to the sticker that came with your satellite receiver and apply the sticker to the inside of the remote battery cover.
Note: When you change the remote batteries, be sure to swap the batteries as quickly as possible. Otherwise, you may need to reprogram these codes into the remote.
Changing Remote Address
Dish Network satellite receivers can be programmed to operate on different remote control addresses. Switching to a different address is necessary if you have 2 satellite receivers or if your neighbor’s receiver is set on the same remote address and they are changing your channels.
- Press the Mode button until the remote is in the SAT mode.
- Press the Address button once (the SAT mode light will start flashing).
- Use the numeric key to enter an address between 1 and 15 (do not put a 0 in front of single-digit addresses; 1 is the default remote address). The SAT mode light will stop flashing and stay lit.
- Press the Address button again to save the change to the remote control. If you entered a valid remote address, the SAT mode light will blink 3 times.
- Make sure the satellite receiver is Powered-off. If not, power the satellite receiver off and wait 15 seconds.
- Press the Info button on the front of the satellite receiver. This will bring up the “Important System Information” menu.
- Press the red Record button the the remote. The screen will update and the “remote address” listed on the screen will change to the new remote address of the remote control.
| Television Device Codes | |
| Akai | 032, 070 |
| Alba | 113 |
| A-Mark | 120 |
| Amstrad | 033 |
| Anam | 009, 021, 041, 120, 121 |
| AOC | 005, 006, 019, 020, 120 |
| Archer | 120 |
| Audiovox | 120 |
| Bauer | 111 |
| Candle | 006, 022, 023, 025 |
| Capehart | 019 |
| Citizen | 006, 016, 022, 023, 024, 025, 026 |
| Concerto | 023 |
| Contec | 027, 028, 041, 091 |
| Craig | 021, 041 |
| Crown | 026 |
| Curtis Mathes | 006, 016, 026 |
| CXC | 041 |
| Daewoo | 005, 026, 029, 030, 031, 032 |
| Dixi | 032, 088, 120 |
| Electrohome | 026 |
| Elta | 032 |
| Emerson | 026, 027, 028, 033, 034, 035, 037, 038, 039, 040, 041, 122 |
| Envision | 006 |
| Etron | 032 |
| Fisher | 042, 090 |
| Formenti | 111 |
| Fortress | 105 |
| Fujitsu | 034 |
| Funai | 034, 041 |
| Futuretech | 041 |
| General Electric (GE) |
003, 008, 009, 015, 040, 043, 044, 130 |
| Genexxa | 113 |
| Goldstar | 005, 023, 026, 045, 046, 088 |
| Grundig | 047 |
| Harman/Kardon TV Projector |
062 |
| Hinari | 034 |
| Hitachi | 023, 026, 048, 049, 050, 051, 052, 053, 054, 055, 126 |
| Infinity | 066 |
| JBL | 066 |
| Jensen | 056 |
| JVC | 057, 058, 059, 060 |
| Kawasho | 062 |
| Kenwood | 006 |
| Kloss | 022, 062, 110 |
| KTV | 026, 039, 040, 041 |
| Logik | 018 |
| Luxman | 023 |
| LXI | 003, 063, 066, 090, 095, 117, 125 |
| Magnavox | 006, 020, 025, 064, 065, 066, 067, 068, 069, 110 |
| Marantz | 006, 066, 088 |
| Matsui | 032, 109 |
| Memorex | 018, 032, 090 |
| MGA | 004, 005, 006, 071 |
| Mitsubishi | 004, 005, 070, 071, 072, 123 |
| MTC | 005, 006, 016, 023, 031 |
| NAD | 002, 117 |
| National | 009, 021 |
| NEC | 005, 006, 007, 017, 023, 127 |
| Nikkai | 112, 113, 118 |
| Novabeam | 062 |
| Onwa | 041 |
| Optonica | 105, 107 |
| Osaki | 112 |
| Panasonic | 008, 009, 010, 011, 012, 066, 074, 075 |
| Penney | 003, 005, 006, 014, 016, 026, 043, 096 |
| Philco | 005, 006, 025, 064, 065, 068, 110 |
| Philips | 066, 088 |
| Pioneer | 002, 048, 051, 076 |
| Portland | 005, 026 |
| Proscan | 003 |
| Proton | 013, 019, 026, 124 |
| Pulsar | 001 |
| Quasar | 008, 009, 075 |
| Radio Shack | 026, 041, 107, 112 |
| RCA | 003, 005, 014, 015, 048, 079, 080, 081, 082, 083, 084, 085, 086, 087, 125, 133, 134 |
| Realistic | 090 |
| Saisho | 032, 033, 109 |
| Sampo | 006, 019 |
| Samsung | 005, 006, 016, 023, 026, 032, 088, 112 |
| Sanyo | 042, 089, 090, 091, 092, 109 |
| SBR | 088 |
| Schneider | 088 |
| Scott | 026, 034, 037, 041, 093 |
| Sears | 003, 023, 034, 042, 063, 089, 090, 094, 095, 096, 097, 098, 099, 100, 101, 102, 103, 104, 117 |
| Sharp | 026, 091, 105, 106, 107, 108, 128, 129 |
| Siemens | 091 |
| Signature | 018 |
| Sony | 000, 109, 119, 122 |
| Soundesign | 025, 041 |
| Spectricon | 020, 120 |
| SSS | 005, 041 |
| Supra | 023 |
| Supre-Macy | 022 |
| Sylvania | 006, 025, 064, 065, 066, 068, 110, 111 |
| Symphonic | 132 |
| Tandy | 105, 113 |
| Tatung | 009 |
| Technics | 008 |
| Techwood | 023 |
| Teknika | 004, 005, 016, 018, 022, 023, 024, 025, 026, 034, 041, 114, 115 |
| Telefunken | 051 |
| Teletech | 032 |
| Tera | 013 |
| Thomson | 051, 116 |
| TMK | 023 |
| Toshiba | 016, 090, 096, 117, 118, 131 |
| Tosonic | 028 |
| Totevision | 026 |
| Universal | 043 |
| Vector Research | 006 |
| Victor | 057 |
| Video Concepts | 070 |
| Vidtech | 005 |
| Viking | 022 |
| Vizio | 627, 505 |
| Wards | 005, 006, 015, 018, 034, 043, 064, 065, 067, 068, 107, 119 |
| Yamaha | 005, 006 |
| Zenith | 001, 018 |
| Zonda | 120 |
| back to the top | |
VCR Device Codes |
|
| Aiwa | 088 |
| Akai | 013, 014, 015, 016, 017, 018, 019, 020, 068 |
| Alba | 046 |
| Amstrad | 088 |
| ASA | 065 |
| Audio Dynamics | 100 |
| Broksonic | 059 |
| Bush | 089 |
| Candle | 080, 092, 093 |
| Canon | 042, 054 |
| Capehart | 043, 046 |
| Citizen | 091, 092, 093 |
| Craig | 091, 108 |
| Curtis Mathes | 054, 092, 105 |
| Daewoo | 034, 046, 047, 093 |
| Daytron | 046 |
| DBX | 100 |
| Dumont | 049 |
| Dynatch | 088 |
| Electrohome | 109 |
| Emerson | 005, 006, 007, 008, 009, 010, 011, 012, 059, 068, 088, 090, 109 |
| Fisher | 048, 049, 084, 108, 110 |
| Funai | 088 |
| General Electric (GE) | 050, 051, 052, 054, 091, 105 |
| Goldstar | 030, 055, 092, 112, 113 |
| Goodmans | 085, 089 |
| Grundig | 065 |
| Harman Kardon | 030, 069 |
| Hinari | 089 |
| Hitachi | 036, 037, 038, 039, 040, 041, 088, 096, 097 |
| ITT | 018 |
| JC Penney | 030, 054, 091, 100, 101 |
| Jensen | 060 |
| JVC | 061, 062, 063, 064, 092, 100, 101 |
| Kenwood | 062, 081, 092, 100, 101 |
| Lloyd | 088 |
| Logik | 089 |
| Luxor | 018 |
| Magnavox | 027, 054, 065, 111 |
| Marantz | 054, 065, 085, 092, 100, 101, 103 |
| MEI | 054 |
| Memorex | 033, 049, 054, 066, 081, 085, 088, 108 |
| MGA | 067, 068, 109 |
| Mitsubishi | 062, 067, 068, 069, 070, 071, 109 |
| MTC | 044, 080, 088 |
| Multitech | 088, 089, 091 |
| NAD | 073 |
| NEC | 030, 031, 032, 062, 092, 099, 100, 101, 102, 103, 104 |
| Optonica | 072, 085 |
| Panasonic | 021, 022, 023, 024, 026, 054, 098, 114 |
| Penney | 054, 080 |
| Pentax | 037, 092 |
| Perdio | 088 |
| Philco | 054, 111 |
| Philips | 054, 065, 085 |
| Pioneer | 062, 073, 074, 075, 076, 100 |
| Portland | 046, 093 |
| Proscan | 105 |
| Pulsar | 033 |
| Quartz | 081 |
| Quasar | 054, 077, 078 |
| Radio Shack | 107, 108, 109, 110 |
| RCA | 025, 026, 027, 028, 029, 037, 091, 105, 106, 115 |
| Realistic | 049, 054, 080, 081, 084, 085, 088 |
| Ricoh | 002 |
| Saisho | 006, 007 |
| Salora | 067, 081 |
| Samsung | 017, 034, 079, 080, 091 |
| Sansui | 032, 044, 062, 100 |
| Sanyo | 049, 081, 082, 083, 108 |
| SBR | 065 |
| Schneider | 089 |
| Scott | 008, 059, 090 |
| Sears | 048, 049, 081, 084, 108, 110 |
| Sentra | 046 |
| Sharp | 085, 107, 109 |
| Shintom | 089 |
| Sony | 000, 001, 002, 003, 004 |
| Sylvania | 054, 067, 088, 111 |
| Symphonic | 088 |
| Tandy | 088 |
| Tashiko | 088 |
| Tatung | 086, 101 |
| Teac | 088, 101 |
| Technics | 054 |
| Teknika | 054, 087, 088 |
| TMK | 006 |
| Toshiba | 034, 067, 090 |
| Totevision | 080, 091 |
| Unitech | 080 |
| Vector Research | 030, 100 |
| Victor | 061, 062, 100 |
| Video Concepts | 068, 100 |
| Videosonic | 091 |
| Wards | 027, 054, 080, 085, 088, 089, 090, 091, 107, 108, 109 |
| Yamaha | 030, 092, 100, 101 |
| Zenith | 001, 002, 033 |
| back to the top | |
| Amplifier Device Codes | |
| Aiwa | 0131, 0143, 0155 |
| Akai | 0142 |
| Carver | 0128, 0147 |
| Denon | 0149 |
| Fisher | 0128, 0147 |
| GE | 0140 |
| Goldstar | 0152 |
| JVC | 0132 |
| Kenwood | 0151 |
| Luxman | 0156 |
| LXI | 0140 |
| Marantz | 0126 |
| Memorex | 0150 |
| NAD | 0144 |
| Nakamichi | 0146 |
| Onkyo | 0134, 0137, 0153, 2660 |
| Optimus | 0139 |
| Panasonic | 0127 |
| Pioneer | 0133, 0150, 0154 |
| Proton | 0129 |
| Quasar | 0127 |
| RCA | 0130 |
| Realistic | 0140, 0141 |
| Revox | 0136 |
| Scott | 0134 |
| Sherwood | 0145 |
| Sony | 0148, 0155 |
| Symphonic | 0141 |
| Technics | 0127 |
| Victor | 0132 |
| Yamaha | 0138 |
| back to the top | |
| Cable Box Device Codes | |
| GI/Tocom | 0140 |
| Hamlin | 0147, 0148 |
| Jerrold | 0135, 0136, 0137, 0149 |
| Oak | 0146 |
| Panasonic | 0144, 0145 |
| Pioneer | 0142, 0143 |
| Regal | 0147 |
| Scientific Atlanta | 0138, 0139, 0150 |
| Zenith | 0141 |
| back to the top | |
Note: Not all the codes listed in these tables are valid for all remote controls.
Dish 500 Remote Address
The new remotes that ship with Dish 500 systems (the very least a 4722 Dish 500 system comes with one) and it has some new features, and took away some others. Specifically there is no address button on the remote for changing the address if you have multiple receivers. The new process is pretty simple, but not intuitive.
To change the address do the following:
- Press the System Info button and the Information screen will be displayed
- Press and hold the Sat button until it starts blinking
- Press the # you want to change the address to (1-15)
- Press the # key and immediately press the record button.
- This should change the address.
i hav a sony tv as a second tv , and all the channels are locked how cani unlucked the channel by using a dishnetwork remote? thx